
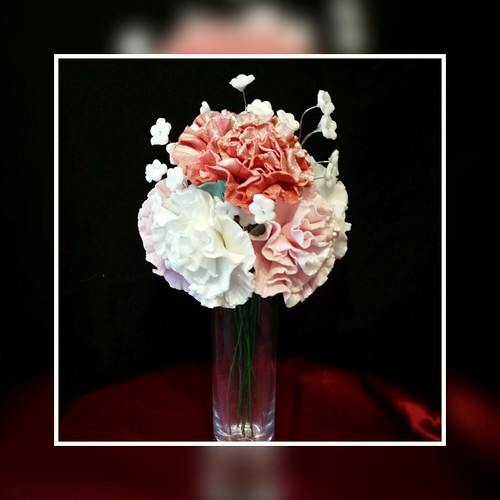
I had one, maybe two problems:
- I don't own a carnation cutter
- I have no florist tape! You need some! However, the fact that I didn;t have any will not affect the quality of this "How-To"
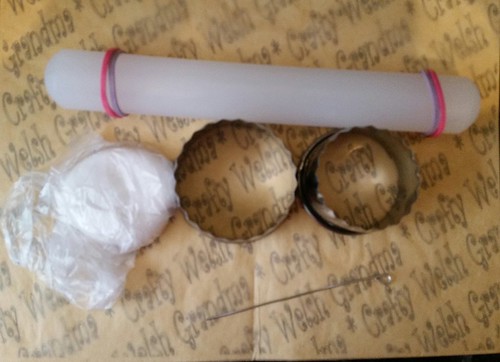
- 1 small scalloped edged cookiecreation
- 1 medium scalloped edged cookie cutter
- Modelling fondant of your own colour choice (standard fondant will not work)
- Your rolling pin and tools
- Small calyx cutter (optional)
- A little green modelling fondant (optional)
- A cocktail stick
- Wire, curled over into a loop at the top
- Florist tape (I didn't have any and you will see what I used later in this post)
- Edible glue / water
- Brush for glue / water
Step #1: Cover the loop with the florist tape
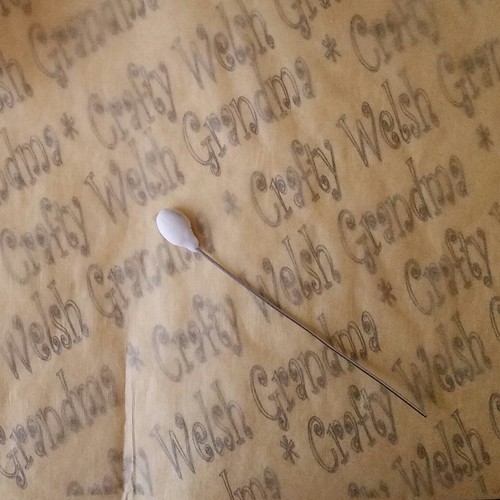
Here, I had a problem. As this was an impromptu make this morning, I had no tape. So I covered the loop at the top of my wire using modelling fondant. This was a bad choice so don't make the same error as I did, make sure you get florist tape, your fondant creation will grip onto it and wont slip off the wire as mine did at first. Cover the loop and a few mm's down the wire
Step #2: Cut your shapes
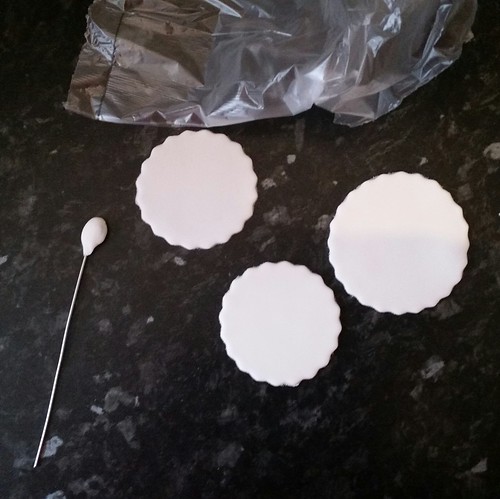
- For each carnation you will need to cut two small and one medium scalloped edges circles.
- Place them under cover so they do not dry off.
- If you are making more than one carnation, cut one small one for each carnation before you go onto cutting the other small one (and then later your medium one)
Step #3: Roll edges
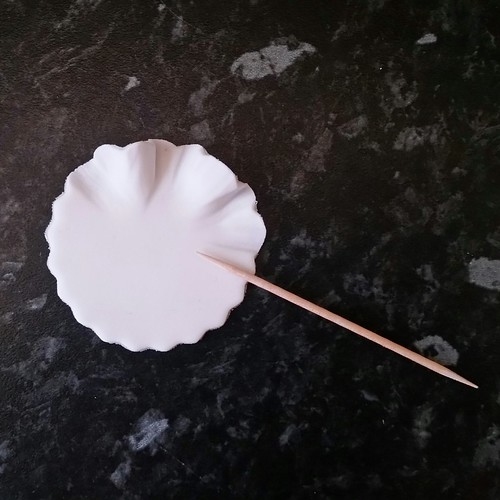
- Using your cocktail stick, roll out each individual scallop.
- If they crack or break, don't worry, this will add to the effect!
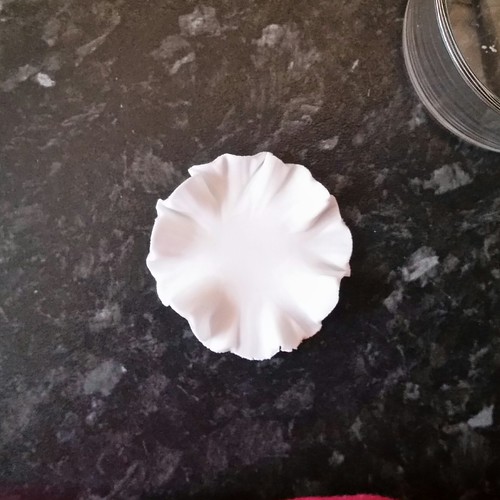
- Do this all the way around.
- Already you can see the beautiful, frilled edged of the carnation forming.
Step #4: Add to wire, fold an dry

- Add glue / water to the centre portion of your frilled circle and place wire through the centre of your circle up to the tape.
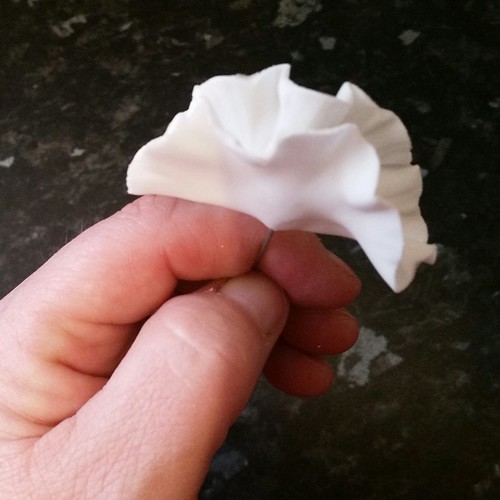
- Fold in half and gently press together
Step #5: Bring edges to centre
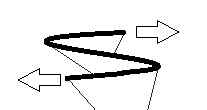
- Imagine what you have in front of you divided into three portions ...
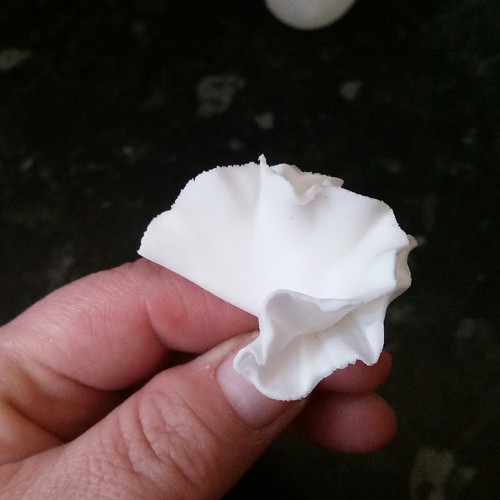
- Dab a little glue / water onto the centre portion and bring the right portion over then, pressing gently, stick it to the middle.
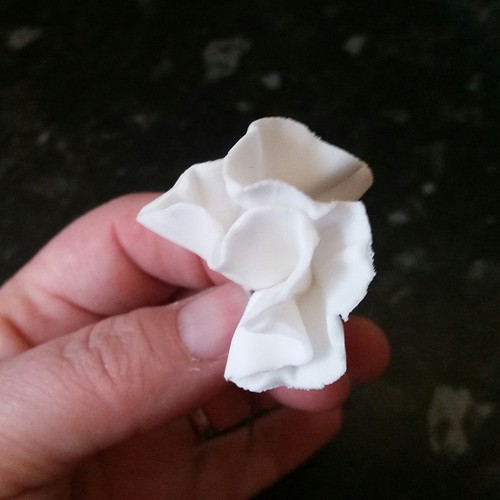
- Turn your creation around and repeat.
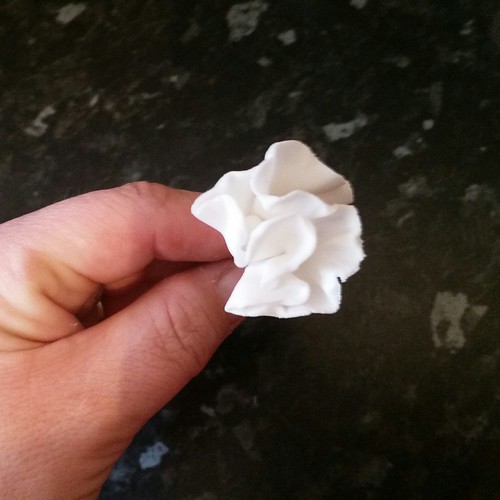
- Pinch the underside so it grips onto any tape you have showing (or just the wire) so it's nice and tight.
- Hang your creation upside down to dry
Step #6: Second circle

- Repeat Step #3 with your second circle.
- Add a dab of glue / water to the centre, push wire through the centre and bring up, tightly by carefully, to meet the first circle.
- Pinch gently so this second circle sticks to the first and also to the wire.
- Hang upside down and allow to dry
- At this point, you can stop if you only need the small carnation
Step #7: Repeat Step # 6 with the medium circle
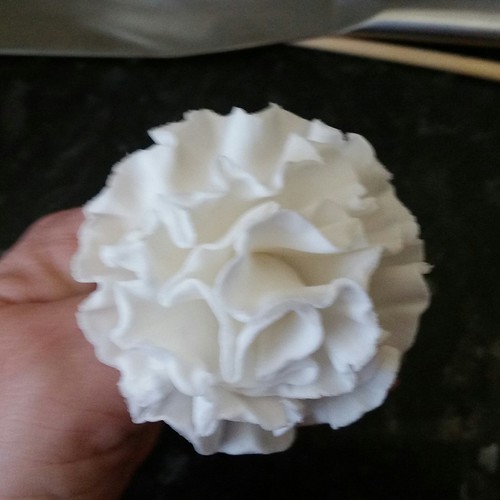
- Repeat the previous step with the larger (medium) circle
- Hang upside down to dry
Step #8: Underside leaves (optional)
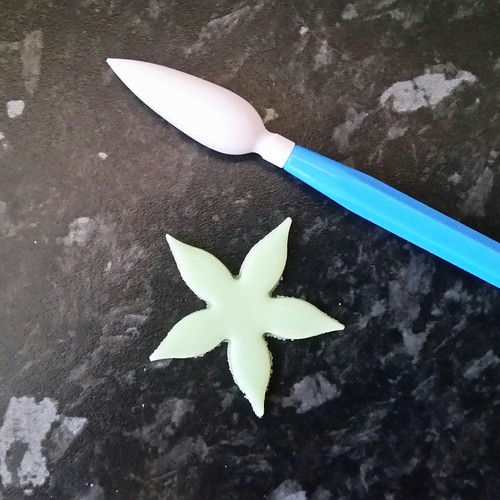
- Using your smallest calyx cutter, cut out some greenery
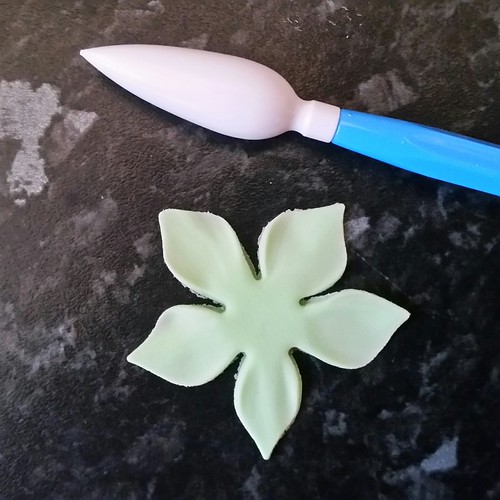
- Using your tool, spread out the leaves
- Add this to the bottom of your carnation in the same way as you have been adding the circles
- Pinch to the wire
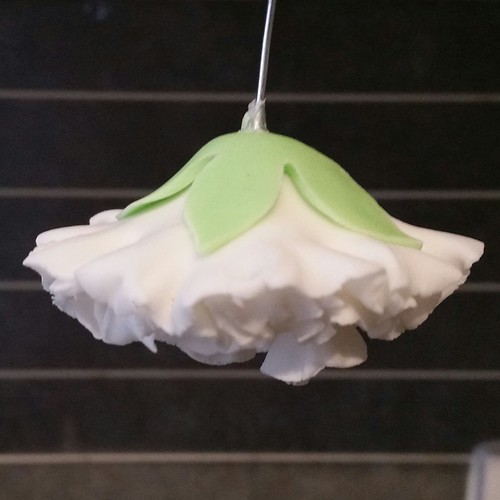
- Hang upside down until dry
Enjoy your creation

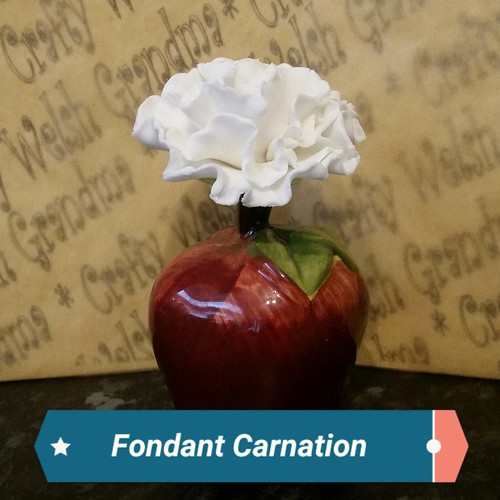
I did not have a stem / bud vase at first to display my creation but hey, it looks mighty fine in my ornamental apple salt shaker I brought back from the States with me last Autumn (Fall)

C016B6E16E
ReplyDeletemmorpg oyunlar
sms onay servisi
en güvenilir mobil ödeme bozdurma
güvenilir takipçi satın alma
avast cleanup aktivasyon kodu
B1C76EDF
ReplyDeleteForum
Forum
Forum
Forum
Forum
Forum
Forum
Forum
Forum