Showing posts with label David's. Show all posts

Wednesday, 18 January 2017

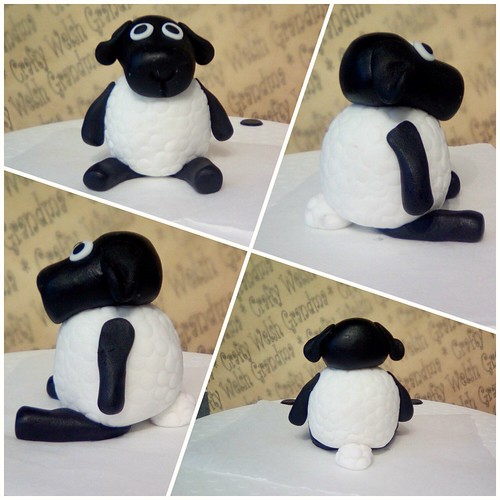
Fondant Sheep cake topper


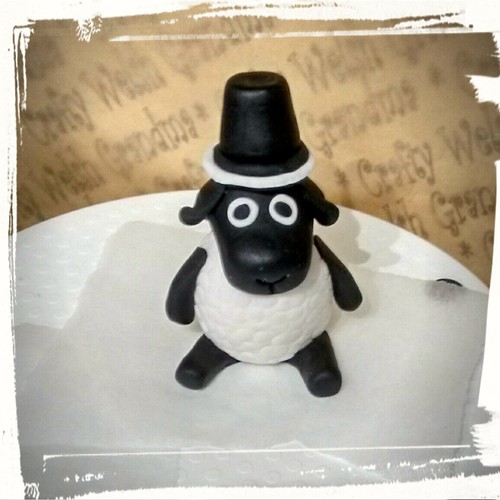
With St David's Day due in March, I'm trying to create as many Welsh cupcake / cake toppers as possible. Today, it's a fondant Welsh sheep - and nope, this one has not made an appearance in Shaun the Sheep lol.


Stuff you need:
All you need for this creation is white and black fondant and something to make circular imprints with.  This will simulate the woolly fleece.

Step 1: Head
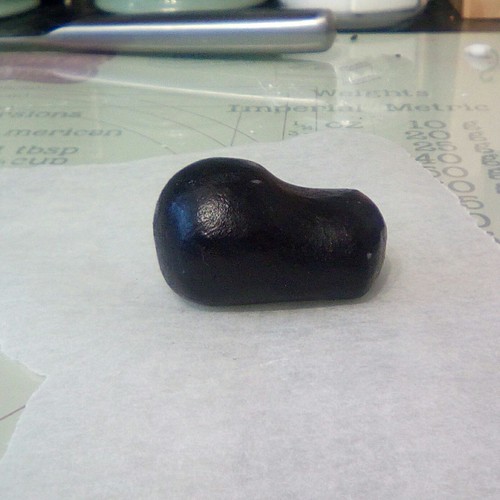
Roll a ball of black fondant, then flatten it a little to a short, fat sausage shape. Press the one side and roll it a little so you end up with this shape (above) profile.

Step 2: Mouth detail
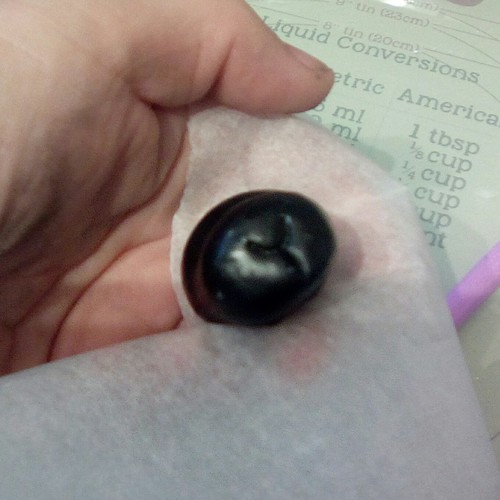
Using your scallop tool, add a little indent then a straight line from the middle and down

Step 3: Body
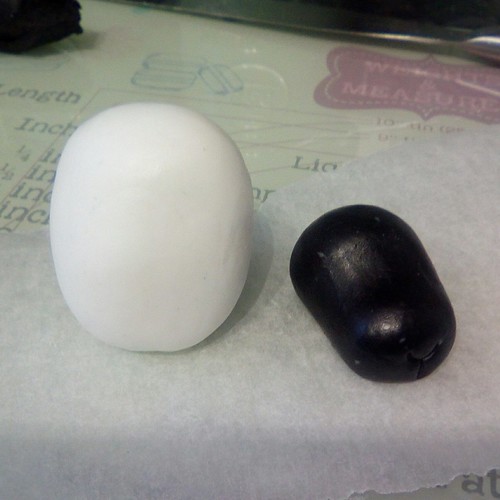
Roll a ball of white fondant in proportion to the black. Once rolled into a ball, flatten the sides so it becomes an almost egg shape.

Step 4: Wool fleece 

I couldn't find anything in my tool collection to make a circle shape imprint all over the body, so I tool the head off one of my tools, which left me with a tube and a perfect circular shape to make imprints.
Do this all over the body.

Step 5: Fix head to body
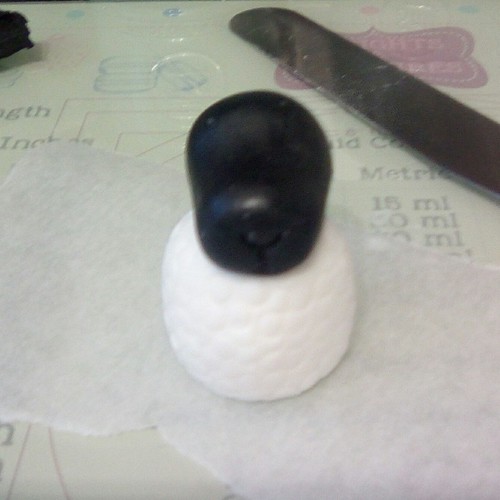
Insert a cocktail stick down into the body and trim excess. Use a little water or edible glue, stick the head to the body.


Step 6: Eyes
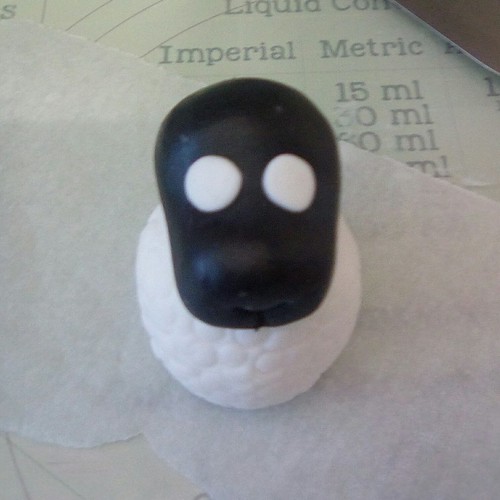
Roll two small white balls for the eyes and stick on

Step 7:
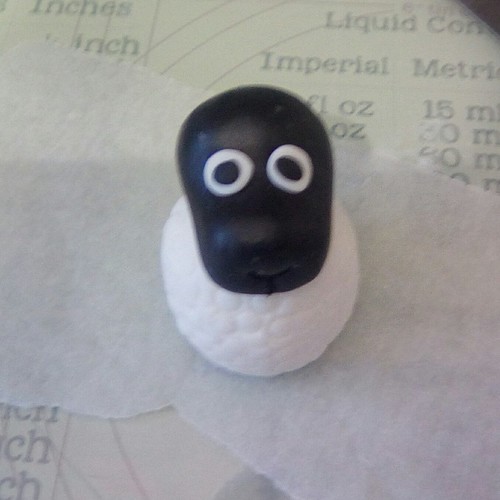
Roll two smaller balls of black, fix to the centre of the whites to finish off the eyes.

Step 8: Ears

Whilst maintaining the proportions, roll two balls of black fondant, squash or roll flat then shape into long, rounded pieces.  These will be the ears.


Glue both to the sides of your sheep's head

Step 9: Back legs
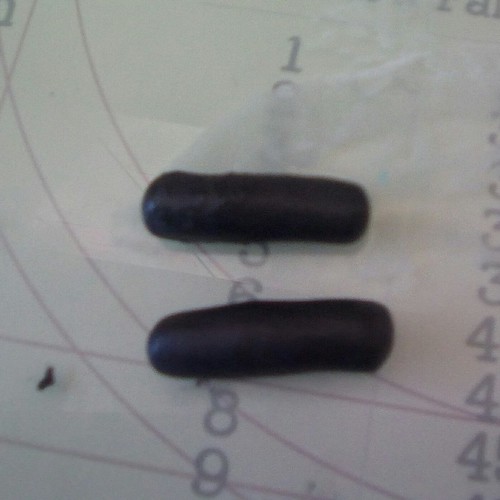
Again, maintaining your proportions, roll two sausage shapes. Flatten one end to fit under the body, dab a little edible glue or water on the flattened part ...
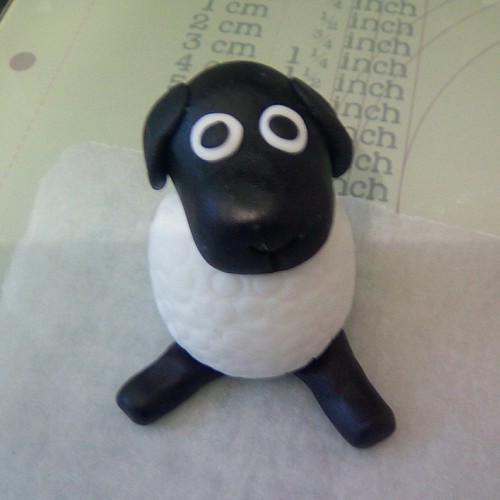

... then place them under the body. Tap the bottom of the feet / soles with something flat to flatten them out

Step 10: Tail
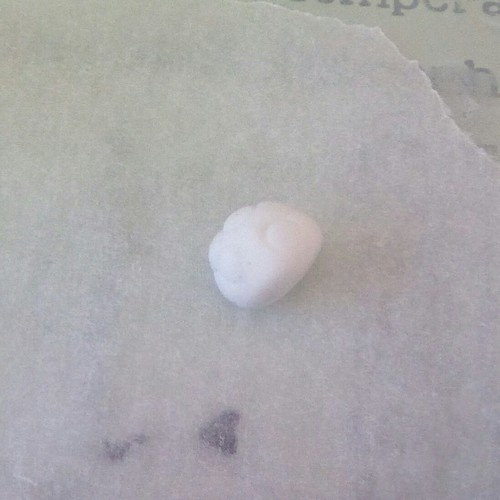
Roll a small ball of whit fondant, imprint with the circles the same as the body then, flatten one side, dab some edible glue or water on the flattened portion and stick under the bottom of your sheep at the back

Step 11: "Arms" / Front legs
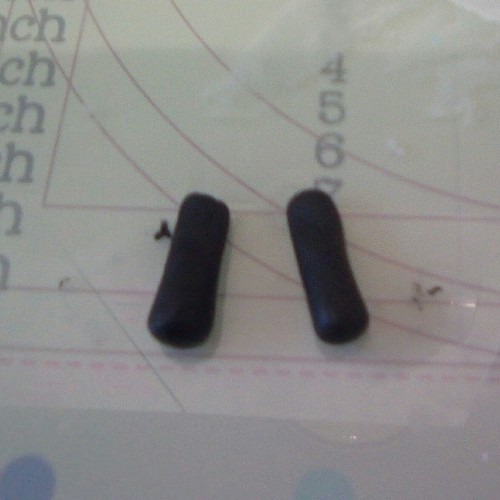
Roll two thinner sausages, squash the top flat, the same as you did for the legs. Before fixing to your sheep, flatten the bottom of the 'arms' / front legs to imitate the feet


Using your edible glue / water, fix the 'arms' by the flattened portion to your sheep.

Allow to dry

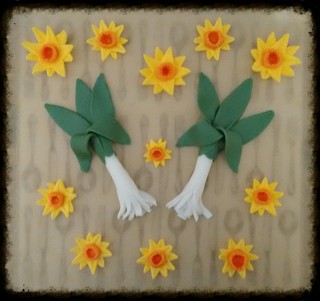
Now, if like me you like a bit of a laugh, and because these sheep are for St David's Day cake topper, I've added a Welsh hat.

Featured Post

Now available as a free eBook, to download, click here

Tuesday, 30 August 2016

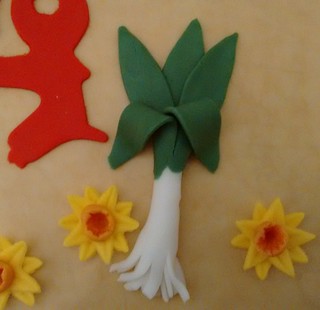
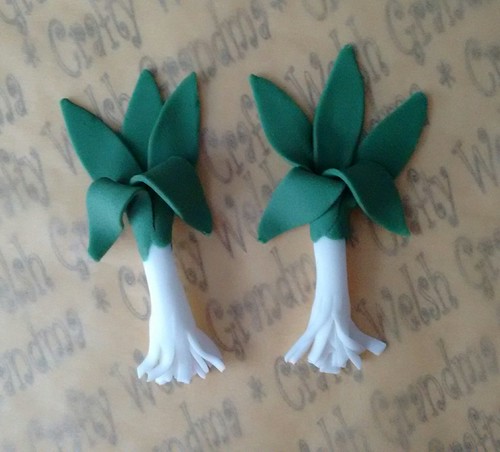
Fondant Leek - How to

Ok, so I know it's August / September-ish, and I also know that St David's Day isn't until March, but I made them now and felt it best to get the post up early - before I forgot about it.


These are made much in the same way as we made the felt ones at school or for our kids. So if you can remember that, you're half way there, if not, read on ...

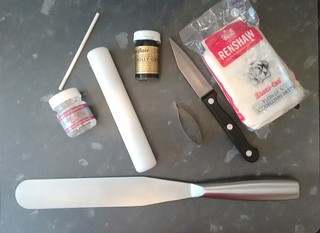
You will need:
  • Modelling fondant - white and green
  • Green food colour paste if colouring your own fondant 
  • A flexible spatula
  • Small, sharp knife
  • Rolling pin
  • Edible glue or water
  • Leaf cutter (optional)
  • Cake pop stick (optional)
  • Ball tool (not shown)

Step 1:
Take just less than half of your fondant and colour it in green.

Step 2:

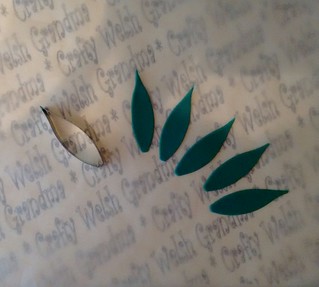
Roll out your green fondant and, using your cutter, cut five leaves


If you don't have a leaf cutter, don't worry, they can be easily cut by hand without one.

Step 3:

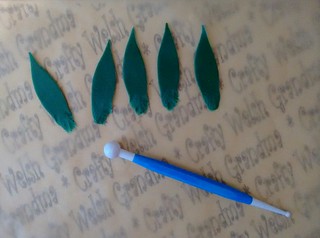
Using your ball tool, flatten off the bottom edges of all five leaves.

Step 4:

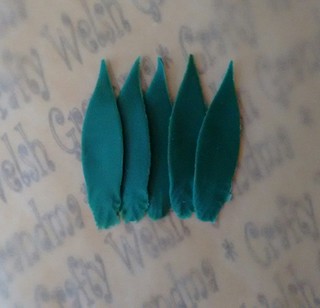
Lay each leaf flat and overlapping the leaf next to it. Start with the centre leaf, then the second at third leaf lay either side to the first, the leaves four and five on the ends.

At this point, you can chose to trim the bottom edges of the leaves straight. Personally, I like to leave mine as they are as it gives the uneven, more "natural" look of the finished leek.

Remember the centre, #1, leaf!

Step 5:

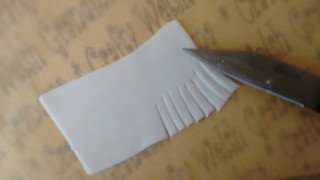
Next, roll out your white fondant to the same thickness as the green, cut it into a rectangle wider than the five leaves (use your spatula as this will give you a smart, straight edge). 

Once you've don't that, use your knife to cut a frayed edge about 1/3 if the way up.

Step 6:

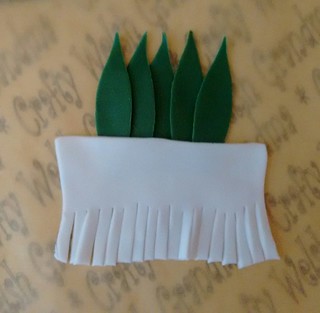
Dab a little edible glue or water on the bottom of the green leaves then lay the white fondant over the bottom, about 1/3 of the way.

Use your rolling pin to gently press the edge, where the green and white meet behind, to secure them togeher

Use your knife to trim the excess white off.

If you make an error, don't worry because we're going to "hide" it in the next step.

Step 7:
Now for the fiddley bit


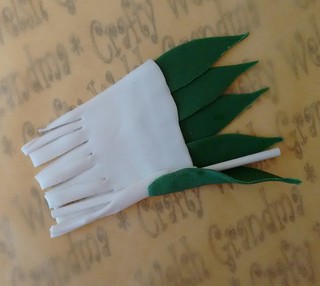
Take the edge and start, slowly, to roll relatively tightly. Make sure you don't damage any leaves or the "roots" and "stem".

If you find it difficult to roll " freehand", enter the cake pop stick. Once rolled, gently remove the stiƧk.

Step 8:
Remember leaf #1?
Ok, find this leaf because this leaf will be at the centre at the back

Spread the leaves #2 and #3 out a little then,
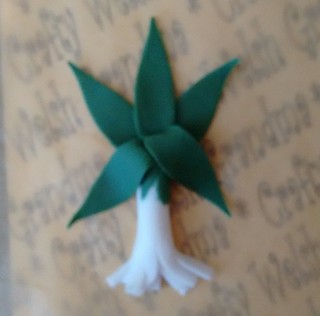
Bring over leaves #4 and #5 so they now "hang" over the front of the white stem with the roots on the bottom.

Gently put a "kink" in these two leaves (see picture) and allow to dry

Also available on Instructables
Featured Post


Saturday, 27 August 2016

Welsh Leek - Modelling fondant


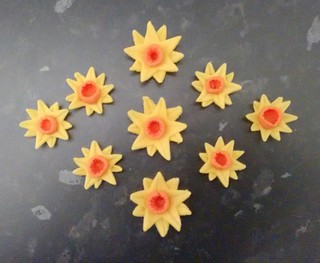
A few days ago, I made a half decent daffodil, a day or so later, I did a "how to, step-by-step" thing and made some more.

Today, after failing to find a fondant mould or even a "how to” anywhere, I decided to have a go at a leek. A bit of early practice for St David's Day, which isn't until March 1st, but it was fun.

I have completed the " how to" post, click here


Wednesday, 24 August 2016

Step by step fondant daffodil

So, last week I tried my first ever fondant daffodil, it worked out OK for a first try, but I didn't take step by step images. I don't have daffodil cutters, so I had to improvise because I didn't want to buy one just for one cake.  I needed more flowers anyway, so here are the instructions...

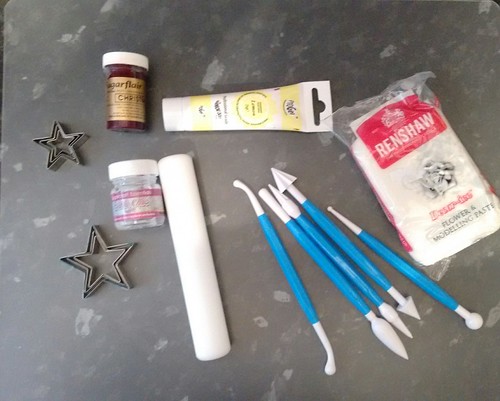
Bits you need:
  • Your rolling pin
  • Tools
  • Star cutters
  • Modelling fondant
  • Yellow and red (or orange) food colour (gels or pastes, I used both) or
  • Yellow and red (or orange) modelling fondant 
  • Edible glue
  • Icing sugar to stop fondant sticking to your board
I also used, not in the picture above, 
  • A cake tester skewer or cocktail stick
  • A dome shaped "cup" eg egg cup. I used a cake pop tray

Step 1:
Colour your fondant yellow then pinch about 1/3 of it and add a tiny quantity of red to make orange.

Step 2:

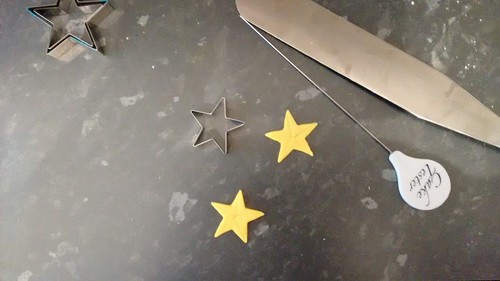
Roll out the yellow, using the desired size star cutter, cut out stars. You need two per flower.

Step 3:
Using your cake tester or cocktail stick, make an indent from the point of the star to the centre. Do not cut or split the point.

My picture didn't show it very well, so I've added this image to help.

Step 4:
Next, put a dab of glue, or water, in the centre of the star that will be on the bottom. Then place the second star on top in such a way that you now have ten "petals".

Step 5:

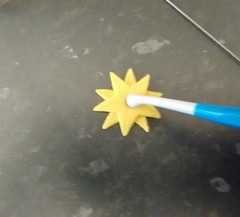
Using your ball tool, press lightly in the centre. Don't push tool all the way through.

Step 6:

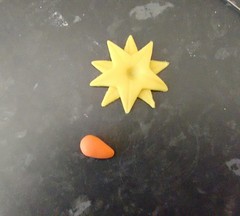
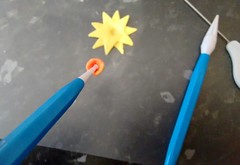
Roll a small amount of the orange fondant into a ball then pinch one end, so it looks like a cone.

Step 7:

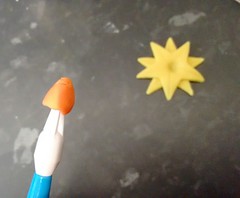
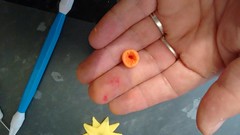
Press your star tool into the thicker end and roll it between your fingers to widen the hole you've made.

This will also give you a pattern inside like the trumpet of a daffodil.
Sorry about the red food colour still on my fingers ;-)

If you're finding the cones hard to make, see the update at the end of this post.

Step 8:
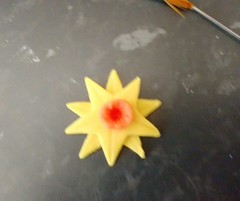
Add a dab of glue or water to the centre of your petals


Then take your small ball tool, press gently into the middle of the trumpet.


Pick it up attached to the ball tool and press it into the centre of your stars / petals. 
If you can't pick the "trumpet" up with the ball tool, use your fingers. Place it in the centre of your petals then push gently, in the centre, with your small ball tool

Step 9:

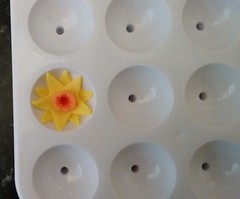
If you can, try to pick the flower up using the ball tool and place it into your egg cup shaped holder, if not, just slide it in carefully
The holder will allow the flower to dry with the leaves curled up, like the real thing.


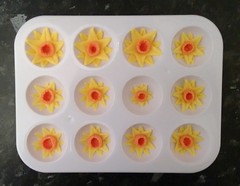
I made a few, only one very small, it was too fiddley so that's all I did that size

Step 10:
Allow to dry and stick to your cake / top off your cupcake


Update:

If you're find those little centre cones just too fiddly, try these:
  1. You need small flower plunger cutters
  2. Cut them out
  3. Shape using a ball tool by curling the pettals upward
  4. Attach to your star shaped leaves in the same way as above. 


I hope you found this post useful. Please feel free to leave comments or questions below or let me know how yours turned out.

Also available on Instructables
Featured Post


Update: November 2017
It is unfortunate that this post and / or the post on my Instructables has been stolen, copied and passed off as someone else's on another website.
Whilst I appreciate and am flattered when readers share my work, all I ask if that you share the link. This way, I am credited accordingly without any bad feelings.

Related Posts Plugin for WordPress, Blogger...