Friday 31 March 2017

Caramac® Post DECHOX Cake


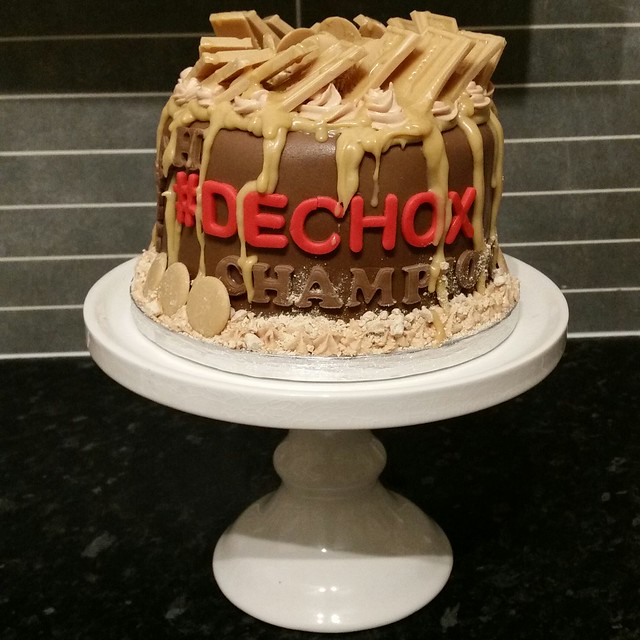
Made for a DECHOX champion! 

Every year my family and I indulge in a little fundraising. Previously, I have undertaken the DECHOX for the British Heart Foundation challenge, this is one of the charities that is very close to my 💖 - if you pardon the pun.

This year was different. I was not able to participate, simply because I have gone right off chocolate and related products. So I supported by good friend, Sarah, with hers.

For the month of March, Dechoxers abstain from all chocolate related products, which even includes the sprinkles on the cappuccino!

Click image above for
DECHOX information

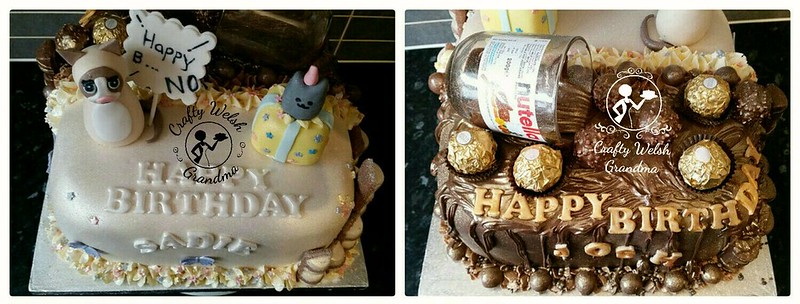
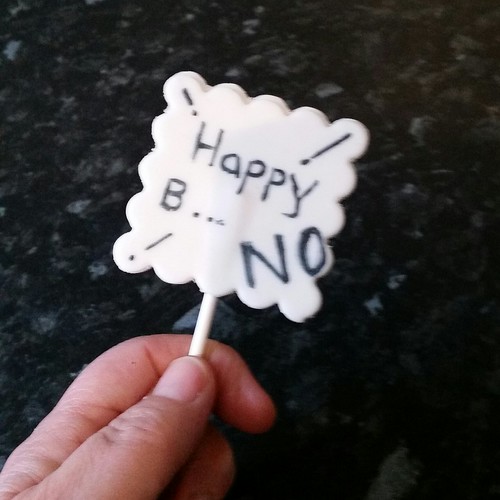
As a post DECHOX "well done prize" I made Sarah a cake laced with Caramac, as she 'hinted' how much she liked Caramac.

For the sponge, I added caramel extract / flavouring simply because cocoa is too overpowering and I wasn't able to find a similar caramel product.

For the buttercream, I added the caramel flavouring as well as some chocolate coloured food colour paste.

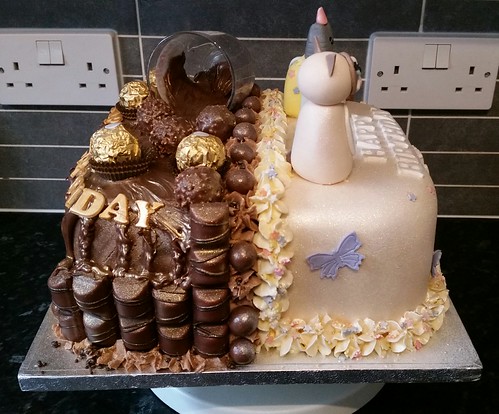
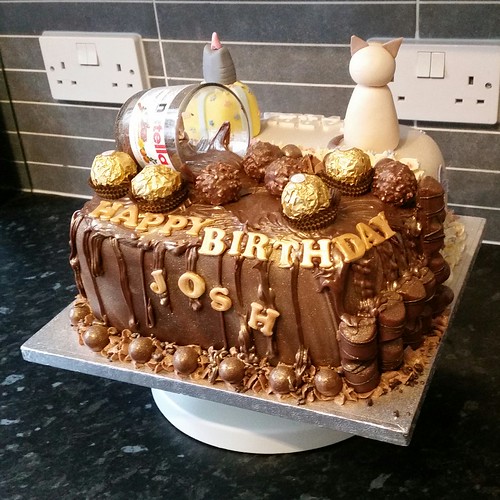
For the ganache centre, I added Caramac instead of chocolate, this was also used to top off the cake

Note: Caramac is not as "solid" as chocolate and dark chocolate, you may need to adjust your mix by adding a little more Caramac into the ratio or slightly less cream.

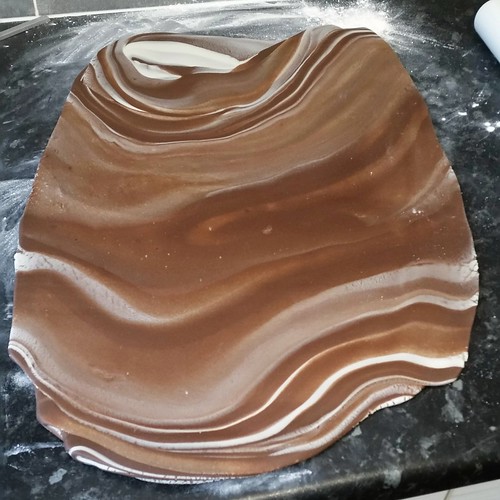
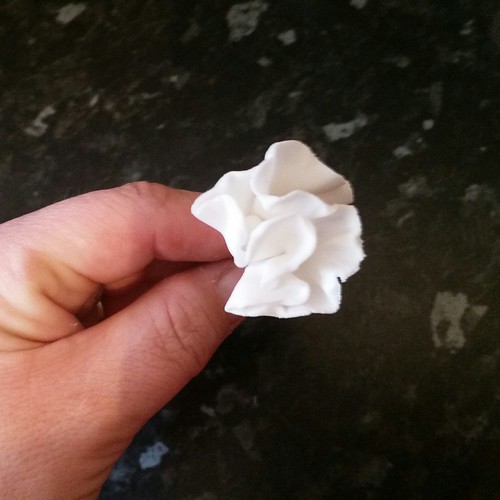
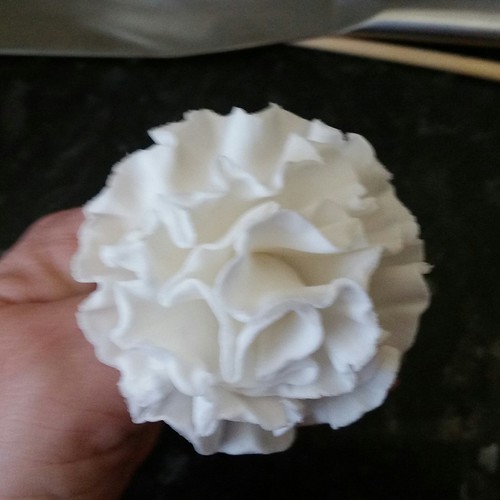
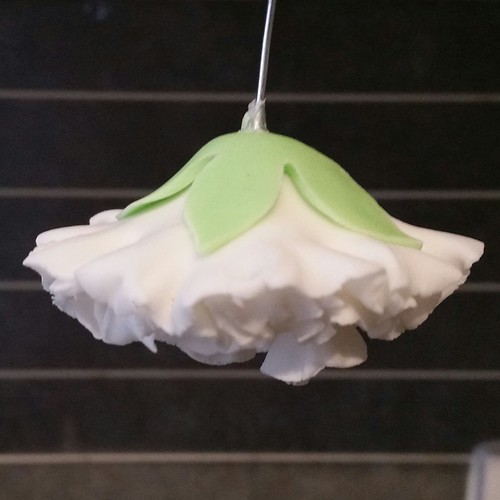
The fondant is a blend of chocolate flavoured and white chocolate flavoured fondant. The same ganache as I used to sandwhich the sponges together was used to drizzle over the top and sides of the cake and the Caramac butter icing was piped around the top. Then topped off, once more, with Caramac pieces.

So, whilst I disappointed that I was unable to participate in 2017,  I'd like to encourage you all to support the British Heart Foundation and Sarah by either donating directly to the BHF here, or by using Sarah's JustGiving page.


Well done to all Dechoxers


Thursday 23 March 2017

Nutella And Cat Joint Cake


There comes a point, I guess, when you can have too much of a good thing. I'm also guessing that, with their birthdays just two weeks apart, my niece and nephew felt this way about their birthday cakes


Last year they had a Rugby Player Cake and a Three Tier Unicorn Cake. This year, they opted for a joint cake.


My nephew asked for his "half" to be much the same as the Nutella Cake his cousin received last month - with chocolate sponge, ganache etc - whilst my niece wanted something a little more "simple". All she wanted was a gentle vanilla sponge decorated with her two favourite internet sensation cats - Grumpy Cat and Pusheen.


Each "half" was completely different from the other, which reflects my niece and nephew's differences in personality. Therefore, I made two different cakes and "spliced" them together to make one!


Making sure the height on both chocolate and vanilla sponges were the same, which would ultimately involve sandwiching them together with the same thickness filling, I cut the sponges in half and sandwiched them on top of the same flavour cake.

Each sponge consisted of a mix and a half of the recipe and baked in a 23.5cm square tin. As the mix was larger, I decreased the temperature down to gas #3 and baked slowly for at least an hour each.


The Nutella half had the Nutella / chocolate sponge and was sandwiched together with Nutella ganache and crumbcoated with chocolate and Nutella frosting as well as the remaining ganache that I could't get in the cake. Whilst ...


... The vanilla half had a simple vanilla sponge and was sandwhiched together with basic vanilla buttercream and crumbcoated with the same.

Both halves required all sides to be crumbcoated to ensure the bare edge of the sponges would not harden when exposed to the air.  I also added a sprinkle of simple syrup, just to be sure

The Nutella half was covered with a marbled mix of Renshaws chocolate flavoured fondant and Renshaws white chocolate flavoured fondant. I'm not quite sure what happened with the marble effect, but it didn't turn out as awesome as I'd hoped. But it's still awesome I think.


For the vanilla half, my niece wanted the Renshaws white chocolate flavoured fondant.


Up until now, both halves of this cake have been treated as two individual cakes, so a very sparing spray / sprinkle of simple syrup was used to join the sponges together inside and some edible glue was used along the raw edges of the fondants to encourage those to stick together.

The "tricky" part here, I guess, is the fact that the niece wanted no part of her brother's decoration to accidentally find its way over "her half". With this in mind, I pipped on the joining edge with each flavoured frosting on the correct side of the cake. This was to ensure that the Nutella would not encroach onto the vanilla side! Both my niece and nephew were enlightened to the fact that the very centres would be edged in their own frostings and that these would be touching each other. I couldn't see any other way around it. With the exception of a cake card in the middle, and I didn't want to go down that route.


The 'Happy' on this side refused to slide down the side like the 'Birthday' and my nephew's name. But it's refusal to 'conform' has not ruined the overall effect.

The Nutella side was generously doused with gold dust, topped with Ferrero Rocher, some open, some wrapped.  The pipping was topped, alternately, with Maltesers plus some chocolate covered popping candy then a few sticks / chunks of Kinder Bueno were added to the sides for decoration.


The vanilla side was doused in silver dust with an added "something" (see below).  The piping on this side was sprinkled with sugar stars and some white Kinder Bueno was added to reflect her brother's half. Oh! Plus one or more purple butterflies.


At a staggering 15.4lbs in weight, I guess all that's left for me to say is ...
Happy Birthday both of you

Saturday 11 March 2017

Fondant Carnation


I love waking up on a weekend morning feeling inspired! After spending time with my sister yesterday, and finding out that a carnation is her favourite flower too, I felt inspired to teach myself how to make one from fondant and i want to share it with you.

I had one, maybe two problems:
  1. I don't own a carnation cutter
  2. I have no florist tape! You need some! However, the fact that I didn;t have any will not affect the quality of this "How-To"
You will need:
  • 1 small scalloped edged cookiecreation
  • 1 medium scalloped edged cookie cutter
  • Modelling fondant of your own colour choice (standard fondant will not work)
  • Your rolling pin and tools
  • Small calyx cutter (optional)
  • A little green modelling fondant (optional)
  • A cocktail stick
  • Wire, curled over into a loop at the top 
  • Florist tape (I didn't have any and you will see what I used later in this post)
  • Edible glue / water
  • Brush for glue / water
Step #1: Cover the loop with the florist tape


Here, I had a problem. As this was an impromptu make this morning, I had no tape. So I covered the loop at the top of my wire using modelling fondant. This was a bad choice so don't make the same error as I did, make sure you get florist tape, your fondant creation will grip onto it and wont slip off the wire as mine did at first. Cover the loop and a few mm's down the wire

Step #2: Cut your shapes

  • For each carnation you will need to cut two small and one medium scalloped edges circles.
  • Place them under cover so they do not dry off.
  • If you are making more than one carnation, cut one small one for each carnation before you go onto cutting the other small one (and then later your medium one)
Step #3: Roll edges

  • Using your cocktail stick, roll out each individual scallop. 
  • If they crack or break, don't worry, this will add to the effect!
  • Do this all the way around. 
  • Already you can see the beautiful, frilled edged of the carnation forming.
Step #4: Add to wire, fold an dry

  • Add glue / water to the centre portion of your frilled circle and place wire through the centre of your circle up to the tape.
  • Fold in half and gently press together
Step #5: Bring edges to centre
  • Imagine what you have in front of you divided into three portions ...
  • Dab a little glue / water onto the centre portion and bring the right portion over then, pressing gently, stick it to the middle. 
  • Turn your creation around and repeat.
  • Pinch the underside so it grips onto any tape you have showing (or just the wire) so it's nice and tight.
  • Hang your creation upside down to dry
Step #6: Second circle


  • Repeat Step #3 with your second circle.
  • Add a dab of glue / water to the centre, push wire through the centre and bring up, tightly by carefully, to meet the first circle. 
  • Pinch gently so this second circle sticks to the first and also to the wire.
  • Hang upside down and allow to dry
  • At this point, you can stop if you only need the small carnation
Step #7: Repeat Step # 6 with the medium circle

  • Repeat the previous step with the larger (medium) circle
  • Hang upside down to dry
Step #8: Underside leaves (optional)

  • Using your smallest calyx cutter, cut out some greenery
  • Using your tool, spread out the leaves
  • Add this to the bottom of your carnation in the same way as you have been adding the circles
  • Pinch to the wire
  • Hang upside down until dry
Enjoy your creation


I did not have a stem / bud vase at first to display my creation but hey, it looks mighty fine in my ornamental apple salt shaker I brought back from the States with me last Autumn (Fall)


 Click here for the Insructables post

Thursday 9 March 2017

Gallery pages

My gallery page was becoming too overcrowded with images and links, so I have now separated them into further pages. Just click the page links at the top or the bottom of the gallery.

I hope this makes it easier to load and view as there will now only be a maximum of 10 rows of 4 images per page


Monday 6 March 2017

Grumpy Cat Cake Topper


Grumpy Cat aka Tardar Sauce is a bit of a sensation. But my niece wanted him as a topper for her birthday cake!

You will need:
  • Ivory / Pale brown fondant
  • Light brown fondant
  • Dark brown fondant
  • White fondant
  • Pink fondant
  • Pale blue fondant
  • Black fondant
  • Edible glue / water
  • A cocktail stick or stick of uncooked spaghetti
Step 1: The body and head

  • Using the ivory or pale brown fondant, roll a cone shaped body and flatten the bottom by tapping the cone onto your work surface a few times
  • Using the same fondant, roll a ball in proportion to the body
Step 2: Face detail

  • Cut a light brown circle that is in proportion to the face
  • Cut two triangles, for ears, from the same fondant
  • Cut a smaller white circle (right)
  • Using the cutter you used for the white piece, cut away two sides of the circle so it looks like the shape above.
  • You will need to model the very top into a straighter shape.
  • Using a smaller circle cutter (I used a large circle piping tip) cut two pale blue curcles
  • Cut the tops off both of these
  • Stick all these shapes onto the brown circle (see final image)
Step 3: Underbelly bib

  • From white fondant, cut an oval white shape for the underbelly bib
Step 4: The nose


  • Using pink fondant, mould a sausage shape and make an indent on the bottom in the middle
Construction:

  • Construct the face (as above) before placing on the head of the body
  • My hands are not so steady these days so I will be making some adjustments to this. 
  • Using some small black balls of fondant, stick these onto the pale blue almost half circles then, using white fondant, roll two even smaller balls to use as eye highlights.
  • I messed the eyes up on mine to I waited for it to dry then coloured the misshapen highlights into a more presentable circle shape.
  • Roll two skinny sausage shapes and trim to fit above the pale blue eyes
  • Use an edible pen to draw on the sad mouth.
  • Place the face onto the head ball
  • Using a cocktail stick, insert this into the body leaving some to stick on the head.
  • Place some glue around the visible cocktail stick and stick the head on
  • Ensure you cannot seen the cocktail stick
  • Glue the brown triangles on for ears
  • Glue the underbelly bob onto the front  
  • Roll some dark brown fondant into a tail and, sticking it at the back centre of your work, curl it around to the front

Allow to dry and top off your cake!

Pusheen Cake Topper


This little cutie seemed to make itself so fast that I failed to take step-by-step progress shots! But I will do my best to publish a 'how-to'.  

This Pusheen is 'bursting' out of a gift box wearing a party hat.  

The Pusheen:
  • This is all done by eye
  • Use grey fondant and shape a short, fat sausage
  • Tap this on your work surface whilst it's upright. This will give you a flat bottom
  • Shape the top for ears
    • Make an indent in the middle of the 'head' and bring the two sides to rounded 'points' with your fingers
    • Once you're happy with the basic shape, smooth the centre ready for a party hat.
  • Flatten your Pusheen at the front at the back so it's more of an oval upright sausage with pointed ears
  • Take the blunt edge of a knife and score each side of your Pusheen a few times (see image above)
  • Re-shape your ears until you are happy with the shape
  • For the hat, use a small amount of fondant and roll into a pointed cone, top off with a star (optional)
  • For the face, your can sculpt the features with black fondant of use an edible pen as I did


The Gift Box:
  • This can be made out of a cube of cake that is crumb coated, chilled and covered in a thin base layer of fondant. 
  • The cube can also be made from Rice Krispies with marshmallow and butter, but I haven't modelled anything with this at this time.
  • Once covered in your base layer of fondant, chill again before adding your final layer of fondant.
  • When the second coat is applied you can:
    • Cut the pattern below into the top, It should be no bigger than the bottom of your Pusheen and bring the attached triangles up and fold over onto the gift box
    • Cut triangle shapes from matching gift box fondant and stick these onto the top of your box around your Pusheen 
  • Cut strips of contrasting fondant to use as ribbon.
  • Stick, using edible glue or water, to the sides of your cake. Ensure you cut away the 'ribbon' from the top centre of the cake so your Pusheen fits flat. Fit the ribbon under the triangles
  • Decorate your gift box (optional)
  • Using a cocktail stick, push through gift box, push the Pusheen onto that and then the hat onto the last piece

Top off your cake

Friday 3 March 2017

24 Carrot Gold Cake


The only trouble with this 24 carrot gold cake was, I couldn't fit 24 carrots into the recipe! So, what better way to do 24 carrots was, decorate the cake with the remaining number using handmade fondant carrots!

I used the my faithful carrot cake mix and baked it in a loaf tin.
  • 175g Caster Sugar
  • 175ml Vegetable Oil 
  • 3 large eggs
  • 140g Grated Carrots - which I used 6 small carrots
  • 175g Self Raising Flour
  • 1tsp Baking Powder
The instructions can be found here.

Once crumb coated and chilled, I used a thin layer of basic buttercream, I then covered it in gold tinted fondant and generously undercoated it with PME Gold Lustre spray (available at Amazon) then topped it off with a exceptionally generous coat of Cake Decor Gold Glitter Spray (I got mine from Wilko's but there are many similar products out there).

On the top, before I sprayed the cake, I pressed in the following "24 Carrot Gold", because there are 24 carrots and, well, it is gold 😁😀

I cut the letters from brown, chocolate Renshaw's fondant using my #4 set of cutters

The carrots were handmade:
  1. Roll a small sausage shape of orange fondant
  2. Shape the one end so it tapers to a point.
  3. Use a knife to gently score along the length of your carrot so it looks like the ridges of a carrot. There's nothing wrong with 'ugly veg' so it doesn't have to be perfect.
  4. Using a small daisy cutter, cut a green daisy and 'glue' to the top of your carrot so it looks like the leaves.
  5. I made an indent in the top of each of my carrots and filled it with an edible gold ball
Each carrot was 'painted' roughly with edible gold paint and then sprayed with a little glitter.

This cake if for my oldest son, he loves my carrot cake and, well, Mam didn't want to disappoint. 


Related Posts Plugin for WordPress, Blogger...