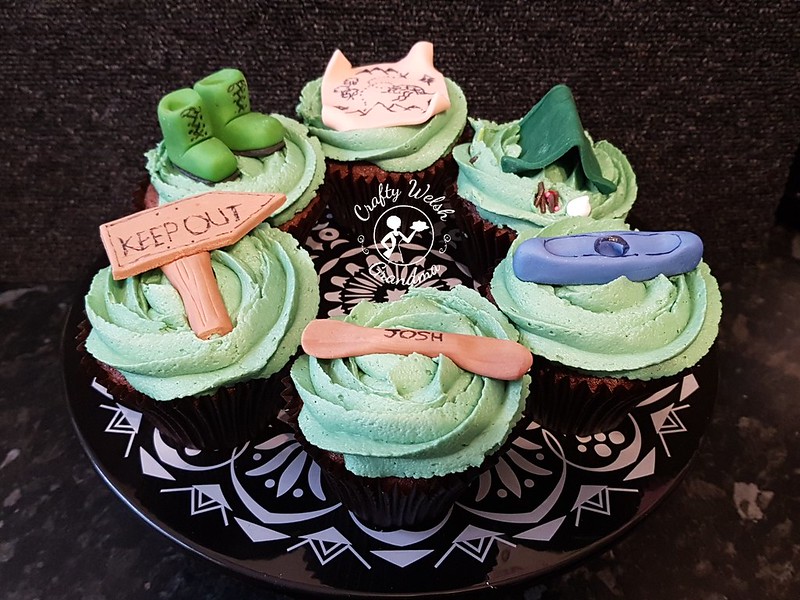
The day will come when I shall run out of ideas for carrot themed carrot cake lol. But it's not this year!
My son loves my carrot cake and, when the chance comes for him to have a birthday cake, he 'needs' it to be ... carrot cake!
I made three six-inch cakes and two four-inch cakes from two mixes of the recipe but added about 25% more to each mix.
Once I have de-humped them, I turned them on their sides and trimmed down one side so they were no longer round cakes. I'd say I trimmed off about 25%, but this never goes to waste in my house.
Once firmly chilled, as this is quite a moist cake if done correctly, I sandwiched each layer together using my
basic buttercream recipe. The reason I have not used the conventional carrot cake frosting is that I find it does not travel well. As this one needs to travel a few hundred miles this weekend, I wanted stability.
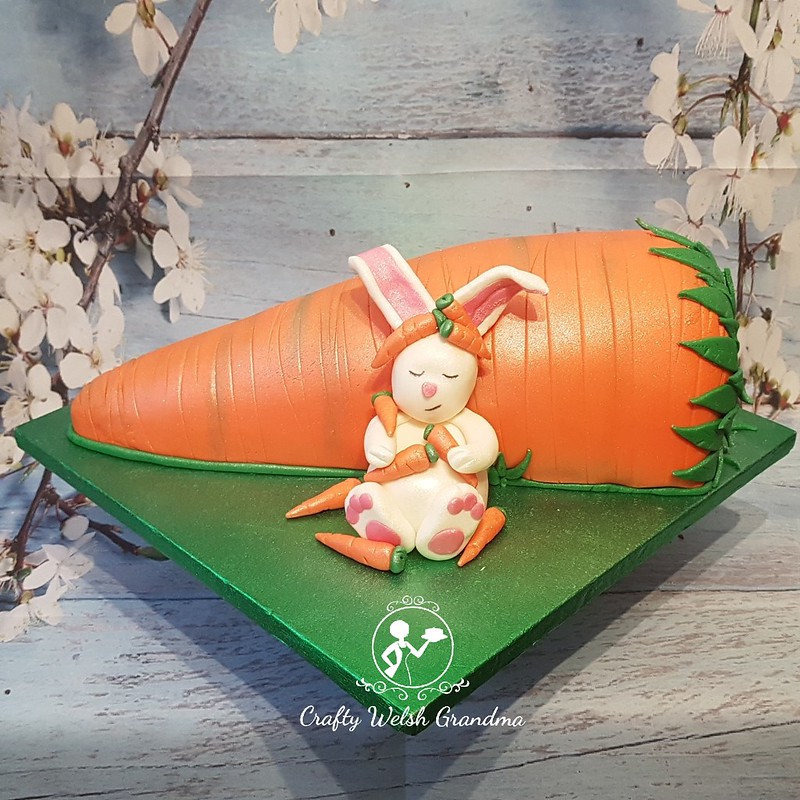
After another chill in the refrigerator, I carved it to a basic carrot shape. It's ok if it's not perfect, after all, wonky veg need love too! Gave it a crumb coat, chilled again, then final coated it and, yes, you guessed it, chilled again, then covered it in orange coloured fondant.
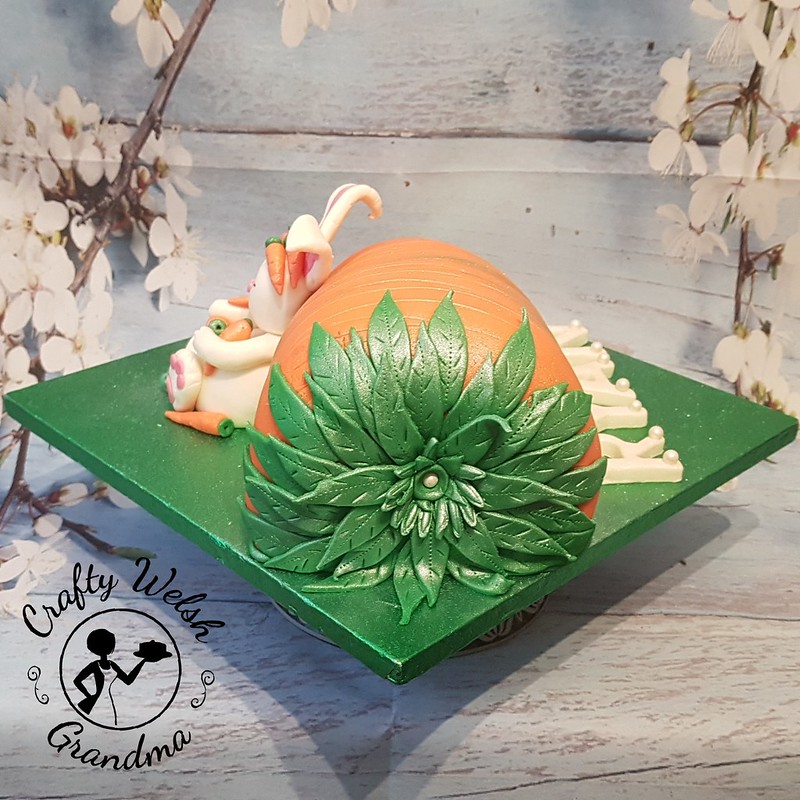
Sitting at the side of the carrot cake is a sweet little snoozing bunny, who has just eaten a load of carrots and is still covered in the carrots he has not eaten.
Regrettably, I did not take step-by-step images of this bunny in progress, but if you check out this
teddy bear tutorial I did some time back and add big ears and massive bunny feet, I don't think you'll go far wrong.
The conventional carrot leaves will not travel well, so I used a simple leaf cutter and added some details for these ones.
As you can see, I've also added the lines that carrots have and, to emphasise some of them I dry brushed them with a mix of dark green, antique gold and white petal dust. I could have used other colours, but these were all I had at the time, it worked well I thought.
You will also note some errors and dents, some intentional and some are genuine errors. I used a new brand of fondant which, in all honesty, I shall never use again. It was terrible to work with so I'm going to stick with good old faithful Renshaws!
Add the name, up in 'lights' with some pearled candy balls, spray with a little pearl lustre and some silver lustre dust and voila! done.
This little wonder will be traveling in its box with tissue paper stuffed under the bunny's ears, just to make sure they get there still attached.