Sunday 20 November 2016

Bara Brith - A traditional Welsh fruit / tea bread


A traditional Welsh fruit loaf made with tea.
For much more detail, including weight conversions, 
There you will find more photographs and it's a little more comprehensive 


You will need:

On day 1:
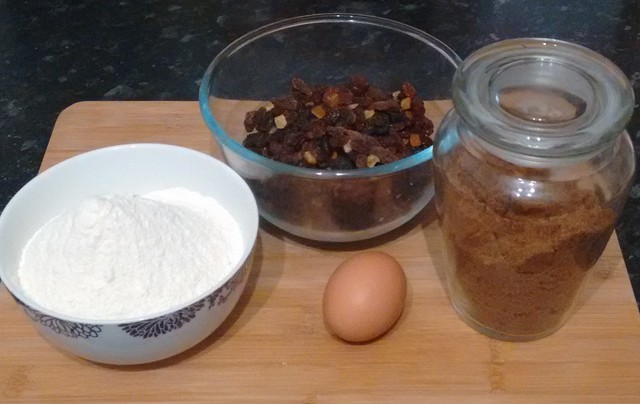
  • 350g Dried mixed fruit
  • 400ml Hot strong tea (not shown)
On day 2:
  • 250g Brown sugar - I use soft, dark brown sugar
  • 600g Self raising flour
  • 1 Egg
  • A well greased and lined large loaf tin or two smaller ones
  • A large mixing bowl
  • A small amount of honey or homemade sugar syrup (optional) for glazing (see "Glaze and allow to cool" step)

Step #1: Soak fruit in tea overnight (Day 1)


This process should be done the evening before you are due to bake your Bara Brith
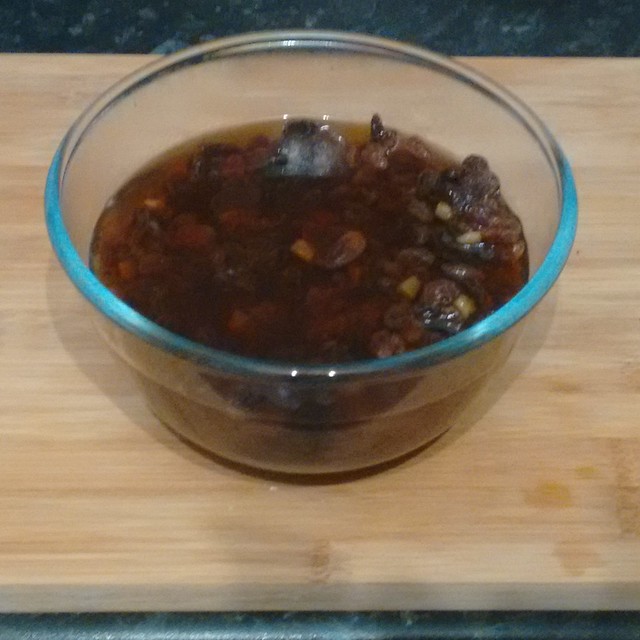
  • Make your tea with boiling water.
  • I use organic Earl Grey tea bags.
  • Remove teabag
  • When you remove the tea bag, top up the liquid to 400ml
  • Pour over your dried fruit then cover and leave the stand overnight


Step #2: Mix in ingredients (Day 2)

  • After the fruit has soaked overnight, add it to a large mixing bowl and add the sugar.
  • The darker your sugar, the darker the fruit loaf.
  • It will still taste good with lighter sugars
  • Mix in the beaten egg
  • Mix in the flour

Step #3: Pour into tin(s)


  • Line your tin(s) and pour in the mixture. Smooth the top.
  • Bake at 180*C / 350*F / Gas Mk 4 in the middle of the oven.
  • Sit back and enjoy the aroma for the 60 to 90 minutes cooking time.
  • I check mine after an hours, it's usually done by then.
  • Test with skewer. Once your skewer comes out of the cake clean, it's cooked
Tips:
  • I'm going to be honest here, never ever have I been able to 'pour' this mixture.
  • I have always spooned it into the tins.
  • Once spooned in, dampen your fingers and gently push it into the corners and down into the tin.
  • To prevent your finger marks showing on the finished loaf, dampen the back of a metal spoon and smooth the top over

Step #4: Glaze and allow to cool

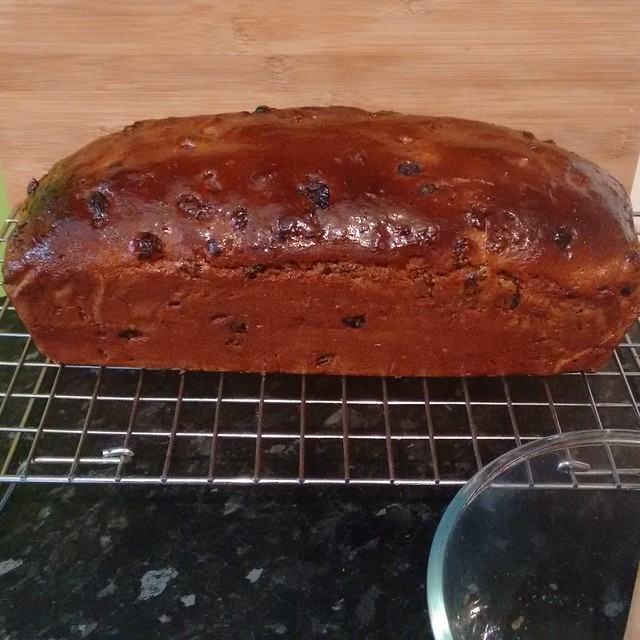
Turn out onto a wire rack and ...
Glaze (optional):
  • I cheat and mix 2 heaped teaspoons with a little boiling water and brush over whilst it's still hot.
  • This will help it stop drying out and give it a wonderful shine
Tip:
  • Whilst it's still a little warm, wrap up for storage, this will ensure the outside does not go hard and crusty
  • Store in a bread bag

Serve buttered and enjoy


For more tips and trick as well as photos and ideas
Please visit my Instructables
Click image above
Featured post

Tuesday 15 November 2016

Autumn Squash Soup


Warm and delicious pumpkin / squash soup.
Inspired by the Panera Bread's Autumn Squash Soup I encountered on a visit to America.
This one is my own 'slant' on the recipe, it doesn't taste exactly the same, but oh boy, is it delicious.
If you change the milk and cream to almond, coconut etc, this recipe is also suitable for vegetarians and vegans
For the full recipe and instructions from my Instructables, please click here - The link will open in a new window
Featured Post

Sunday 13 November 2016

Poppy Cupcakes

Baked for Remembrance Sunday 2016 

Traditional piped icing

Embossed fondant icing


Wednesday 9 November 2016

Fondant Christmas Tree - Snowflake cutter


A step-by-step picture guide on how to make a fondant 
Christmas tree cupcake topper (centre)
using a snowflake cutter

For this you will need:
  • White fondant
  • A small fondant star
  • Glitter spray
  • A cocktail stick
  • Set of snowflake cutters in three sizes
  • Icing sugar / Fondant icing sugar
Note: Add a dab of thick, piped fondant icing to each star before adding the next one


Step 1: Cut out your snowflakes

3No Large
3No Medium
3No Small

Allow to dry a little so they become easier to handle

Step 2: Start stacking


Starting at the bottom and with the largest snowflake, place a dab of piped fondant then stack each snowflake on top of each other in size order.


It was at this point that I dropped my project :-(
so I hope this will still look OK in the images after this

Step 3: Add your small star and sprinkle with some festive magic

Or in this case, a little edible glitter


A featured post on Instructables
Click image above


Fondant Christmas Tree - Daisy Cutter


A step-by-step picture guide on how to make a fondant 
Christmas tree cupcake topper
using a daisy cutter

This tree is pretty much exactly the same as making the one with Star Cutters, see here, but I will post is as an alternative to the previous one

For this you will need:
  • Green fondant
  • White fondant star
  • Glitter spray
  • A cocktail stick
  • Small / Medium daisy cutters in three sizes
Note: Add a dab of water / edible glue to each star before adding the next one

Step 1: Cut out your daisies

4No Large
4No Medium
2 No Small

Step 2: Start stacking

Using your cocktail stick, start stacking your daisies, in reverse order - always keep cocktail stick in the centre of each piece. Keep one small star until the end.

Start with the smallest star and place cocktail stick in centre

Once you have added the small daisy, move onto the medium ones

Keep stacking the medium shapes

Then move onto the largest of the daisy shapes


Step 3: Time for the topper
  • Place your work onto the surface that you will be drying it out on, with a little parchment paper. 
  • Gently remove the cocktail stick using a twisting motion.
  • Add a dab of water and then add your final small daisy to the top.

  • Using a little extra green fondant, make a small, flat-bottomed cone to top off the tree

Step 4: Add your small star and sprinkle with some festive magic

Or in this case, a little edible glitter


Once again, I'd like to thank my niece, Sadie, 
for helping me with the picture above

Also a featured post on Instructables
Click image above

Fondant Christmas Tree - Star Cutter


A step-by-step picture guide on how to make a fondant 
Christmas tree cupcake topper
using a star cutter

For this you will need:
  • Green fondant
  • White fondant star
  • Glitter spray
  • A cocktail stick
  • Small / Medium star cutters in three sizes
Note: Add a dab of water / edible glue to each star before adding the next one

Step 1: Cut out your stars

4No Large
4No Medium
3No Small

Step 2: Start stacking

Using your cocktail stick, start stacking your stars, in reverse order - always keep cocktail stick in the centre of each piece. Keep one small star until the end.

Start with the smallest star and place cocktail stick in centre

Once you have added the two small stars, move onto the medium stars

Keep stacking with the four medium ones, then 

Move onto the biggest four

Step 3: Time for the topper
  • Place your work onto the surface that you will be drying it out on, with a little parchment paper. 
  • Gently remove the cocktail stick using a twisting motion.
  • Add a dab of water and then add your final small star to the top.
  • Using a little extra green fondant, make a small, flat-bottomed cone to top off the tree

Step 4: Add your small star and sprinkle with some festive magic

Or in this case, a little edible glitter


I'd like to thank my niece, Sadie, for helping me
with the picture above

Also available on InstructalesInstructales
Click image above

Saturday 5 November 2016

Fondant Poinsettia

You will need:

  • Modelling fondant (or alternative)
  • Small, medium and large calyx cutters
  • Red food colour paste (not required if you have red modelling paste)
  • Green food colour paste (not required if you have green modelling paste)
  • Gold or silver food colour paste, you can use white if you cant get gold or silver
  • Rolling pin
  • Ball tool with large ball
  • Forming cup
  • Cornflour for rolling out
  • Small star shape cutter or small daisy cutter
  • Water or edible glue and
  • a brush 

Step 1: Roll out fondant and cut
  • Roll out green fondant and cut two using largest cutter
  • Roll out red fondant and cute two medium and two small
  • Always cover your fondant to stop it hardening
  • Add one green shape to the forming cup.
  • Next, add a dab of water or edible glue to the centre, then add the second green shape with its points in the space left by the bottom layer.
  • Using the same process as before, add the two medium sized shapes on top of the green - remembering each time to rotate the top shape slightly so it fills the gap between petals of the layer below.
  • Again, the same process with the smallest red shapes

Step 3: Add a small star or daisy shape
  • Cut out your white star, or colour your fondant with the gold and cut out.
  • Before you add it to your flower, with your large ball tool, gently press all the layers together. A dab of water or glue, then add the star


  • Last but not least, use a small amount of modelling paste, roll into a small ball, add a drop of water or glue to centre then drop the small balls into centre of your flower.
  • Alternatively, you can add a shop bought edible decorative ball

Step 4: Allow to dry


A featured post on Instructables
Click image above

Related Posts Plugin for WordPress, Blogger...