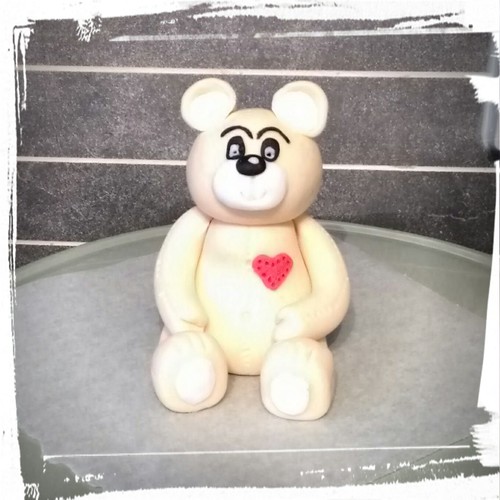
I wanted to try to make a fondant teddy bear. I had no instructions or how-to and had never made one before, so this was going to be a challenge. There are a few changes I'd make on my next trial, these I will list at the end.
Before I started, I coloured my fondant in an ivory colour, I kept some white back for the eyes, sources a tiny piece of red and a little black.
Step #1: The body
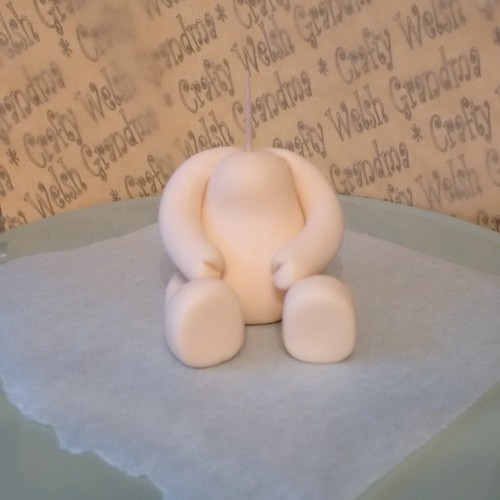
- I rolled a large ball of my main colour, ensuring that any creases were rolled out.
- Then I shaped a cone
- Next, I made an indent about half way up, in the front, to simulate a 'pot belly' of a snugly teddy bear.
- Place this one a piece of grease proof paper
Step #2: The legs
- Still using your main colour, roll a fat sausage and cut in half. This will now make both legs.
- I am unable to give a definitive size and the proportions of your own bear is all personal preference.
- Leaving the 'feet' as a larger ball on the end, hand roll your sausage until the leg itself becomes thinner and the size you'd like for your own bear
- Once I rolled the legs in proportion to the feet, I stood them upright and tapped them on the surface a little, to make flat bottoms on the feet.
- I then cut angles in he leg portion, so each piece would it into the side of the bears body and not bulge out the sides.
Step #4: Affix legs to body
- I fixed teddy's legs to the side, using a dab of water as my glue.
- Once secured, I turned his little feet inward a little.
Step #5: The arms
- Still in main colour, I rolled a skinnier sausage shape to the length I needed then cut it in half to make two arms
- I made indents on the uncut end to make a sort of 'thumb'
- I then cut angles in the other end so it will not bulge on the body.
- Using water as my glue, I stuck them on
Step #6: His head and face
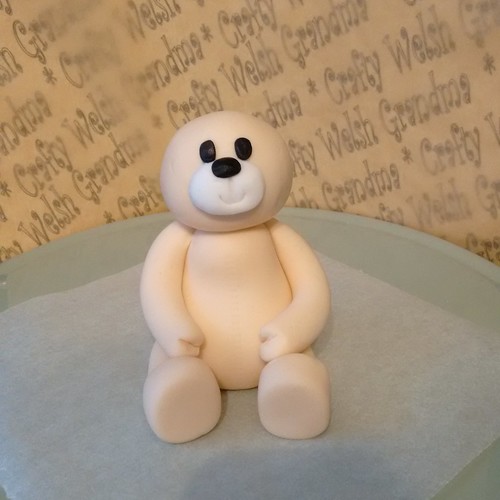
- Using my main colour, I rolled a smaller ball
- Using some white fondant I rolled out an oval shape and flattened it with a rolling pin.
- Fix to the head with a little water
- Using a veining tool, I pressed a line down the centre of his 'muzzle'
- With a scallop tool, I pressed him in a little smile.
- Using a ball tool, I made an indent where I wanted his not to be
- I rolled a tiny piece of black fondant into a ball, shaped it into a small oval and fixed it into the indent I have made with the ball tool
- Again, using a small ball tool, I made indents where I wanted his eyes to go.
- I rolled two smaller balls of black fondant and fixed these into the indents for the eyes
- Insert a cocktail stick into his body
- Place the head on this stick with a dab of water for glue.
Step #7: Ears, face detail and highlights
For the ears:
- I rolled, using main colour, an oval and flattened with a rolling pin
- I did the same again with a white piece of fondant, only smaller
- Fix the white onto the main colour piece.
- Cut in half
- Crease the cut end and fold the bottom only, in half
- Using a ball tool, I made indents in his head where I wanted his ears to be
- Fix on ears
Before I continued, I went around my bear and, using my flattened veining tool, smoothed over each joint to mould the piece to the next so there's no definite seam in the fondant.
I also 'poked' him a little belly button using a small ball tool.
For the eye highlights:
- I rolled two minute balls of white and stuck them onto the black eyes
- I pressed on gently with a flat tool then poked a tiny little hole through to the black,
- These were an absolute nightmare because they're so small.
- I rolled such a skinny sausage shape the fondant almost broke.
- Cut in half and affix above his eyes.
Soles of his feet and toes:
- Roll out two balls of white fondant and flatten
- Fix to the soles of his feet
- Using a toothpick, make three indents on the top of his feet to simulate toes
Step #8:
- Using my comb tool I went around him pressing in some 'stitching' detail in the following places:
- Up the middle of the front of his body
- Same around he back
- Up the middle of the back of his head
- Down the outsides of both arms
- Down both sides of his legs
- I also added a tiny love heart using red fondant
Changes I plan for my next try:
- I'm thinking a darker main colour
- Purchase a quilting tool for the fake stitching
- Do the fake stitching before I put body parts on
- Find a better way to do the eyebrows
- Try not to make him look like he almost has a 'mono-brow'
- Place whites of eyes on the black before I fix them on
- Sort out them thumbs
- Change the way I make his years and fix them on
Check out my "How to" guides for future attempts and efforts
If you can suggest anything else for improvements, please leave me a message below
If you can suggest anything else for improvements, please leave me a message below
Usually I'd place this on my Instructables too, but I want to perfect the process before I do


No comments:
Post a Comment