Friday, 28 April 2017

Justifying artisan prices


I was once an accomplished jewellery crafter and made a necklace using the 'standard' handcrafted formula for pricing, which made it £15.00 (wholesale - hourly rates were a lot less back then). A good friend of mine wanted to buy it so I told her I'd sell it to her for £15.00. She scoffed and recoiled and told me straight "I'm not paying that!"

It was a wonderful, multi coloured piece made from stone beads from around the world, including Preseli Dolerite aka Bluestone, both rare and beautiful. 

Like an idiot, I sold it to her for £6.50, less than the cost of the materials and never made one like that again. In fact, I stopped crating jewellery after that, even though I'd already sold hundreds of other pieces, because if my friends thought I was 'ripping them off', then how could I sell anything?

So how exactly can you or how do you justify artisan prices? 
Well, you shouldn't have to 

"How much!?"

"I love your cakes, but they're too expensive."  

"Sorry, but that's a rip off."

"I can make it myself for less."  

"I can get it for so much less at the supermarket."

"You're not Mary Berry or Nigella Lawson!"

Yes, we've heard it all, and more. As any other artisan or hobbyist will tell you - these are the comments  you never forget! It matters not how many raving excellent reviews you have, they're always there - niggling at your deep inside!

Even now, after baking cakes for many, many years, when I am constantly assured by my recipients that their cake was 'worth every penny', comments like those above just fester and make you doubt yourself, question your prices and can be hurtful after all the work you've put in.

However, as an artisan or hobbyist, you shouldn't need to justify your prices if you've priced correctly and are not outlandish or extortionate.

Yes, you can even bake it for less yourself, after all, your won't need to take into account time and utilities etc.

If you bake at home you'll already know the base / cake ingredients aren't cheap. Then you have to add the fondant, flavourings, buttercream, the drum (cake board), decorations and, of course, a box. When you start looking at a two tier cake there's an additional cake card, the dowels, plus extra fondant and buttercream.

Don't get me started when you have to sculpt a cake - If a cake takes, for example, three mixes and needs sculpting, a chunk of that cake is going to be cut away. Ask yourself ... "Who should pay for that?"

I've come across many formulae for pricing up your work, as you'll know, more often than not, especially with time intensive crafts, you are not going to make a living out of this - mostly.

Now, lets be realistic here, sure, you can go to the supermarket and get a cake for much less, after all, they bake hundreds per hour compared to your one per day or a number of days. Supermarkets don't care that this cake is for your little one's special birthday, to them it's just another cake in a thousand they made today. 
  • If you price too low, you won't make enough money to stay in business.
  • If you price in the middle, you won't make enough money to grow and you'll end up in the constant cycle of creating to sell and selling to create
  • If you price too high, you'll end up scaring your customers off
Sellers on Etsy, craft fayres etc will know, when it comes to jewellery etc, you have a great formula:
Materials plus time equals your item cost.
Item cost multiplied by mark-up equals wholesale price
Wholesale price multiplied by mark-up equals retail price 

Your mark-up is important, this is where your profit comes in. Don't confuse this with money you pay yourself. It has many essential uses. Some examples would be:
  • Buying new tools 
  • Buying new equipment
  • Training
  • Hiring help
  • Paying for apps and software
  • Replacing or upgrading equipment
As long as your market can handle it, the 'suggested' mark-up for your artisan product is between 2 and 2.5. But know your market, get to know your market and get to know your customer individually.

Now, most of this information I have found is for crafters not bakers. I haven't encountered much pricing help online for the artisan cake maker like myself.

So, here is my strategy:
Materials plus utilities plus hourly rate plus mark-up 

Mark-up isn't always possible in my case. So my usual strategy is mainly as  simple as materials plus utilities plus hourly rate, I make no profit. If I need new tools, I use what should be the hourly rate, which must be at least the minimum wage if your use this formula. Yes, I am in the creating to sell and selling to create category, but this is not my full time job, I subsidise much of my work from my 'other' job.

This is not good business sense, but it works for me. I am certainly not advising you to follow my lead. If you want to make a business of it, this is not the way. I reclaim the out of pocket expenses and that about all. Sometimes I'm left just covering the expenses, sometimes I manage to buy a small or replace a small bit of equipment to make things easier for me.

You see, the supermarket that will make your little one's cake and place it on the shelf with all the other special little one's cakes and don't have to worry about putting love into it, as long as they sell it, that's fine. If they don't sell it, it'll probably be in landfill when the use by date expires.

As for me, I can't make hundreds of cakes per day in order to keep the costs down, my cakes involve love, care, knowing the person the cake is for. I bake it in my own small oven, built for domestic use and use my own kitchen, I buy my stuff from a local business - I firmly believe in supporting local (and it somehow costs less than the supermarket). I won't buy a 'no frills' product and nor will I buy eggs from caged hens. I don't use artificial preservatives, so your cake will only last about three days because it only contains good, wholesome ingredients.

A simple, non-sculpted, flat two layer, one tier cake starts and ends something like this:
  1. Preparing a list of resources
  2. Shopping for the best price quality resources
  3. Driving to obtain resources
  4. Making the cake batter
  5. Baking one layer at a time
  6. Making the next layer etc
  7. Baking one layer at a time etc
  8. Chill sponge overnight
  9. Crumb coat and chill for some hours
  10. Coat in butter cream and re-chill for some hours
  11. Layer in fondant and allow to harden for some hours
  12. Make individual decorations
  13. Allow to harden for a few hours
  14. Affix to and decorate the cake
  15. Allow to set for a few hours
  16. Box up and await customer collection or ...
  17. Drive to make delivery
Let's face it, you don't need me to bake you a unique cake at all.  Whether you believe my cakes are worth that much to you has nothing to do with the cost or your budget or the importance of knowing someone made it just for you, it's all completely subjective.

When we became a society where we'd rather support multi-million £ corporations than support family, friends or other artisans is a whole other story!

So next time you ask an artisan to justify their prices, allow them to nip into where you work and tell your boss you're being paid too much or accept that ... when an artisan makes your cake for you, it's for you, no one else, just you. It's unique! It cannot be replicated, even if we try.

It's also nice when an artisan receives positive comments on their blog about your cake and other cakes they've made - Just saying :)

Monday, 24 April 2017

I'm not all about the cake

Did you know that this here Crafty Welsh Grandma is not just cakes, cakes and more cakes?

No? Well, check out my other blogs to see what else I get up to.


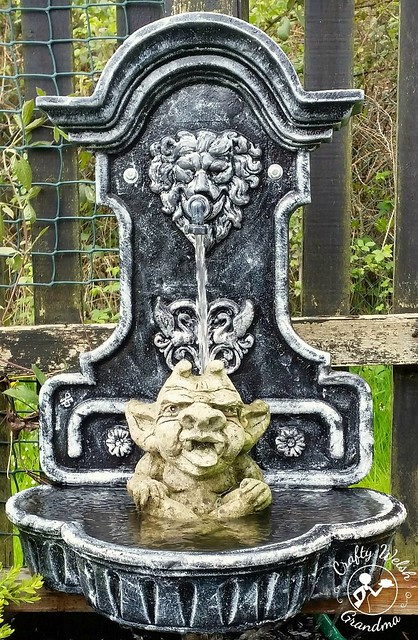
This latest creation (above) can be found on my Garden Crafts Blog, whilst this handsome beastie (below) can be found on my Various Crafts Blog. Or you can click on the images

Why not drop by 😊

Thursday, 13 April 2017

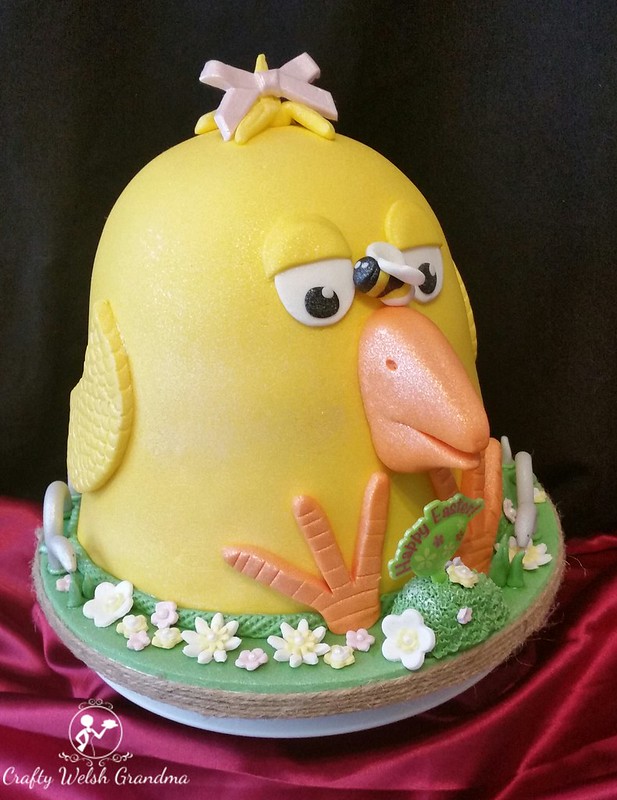
Easter Chick


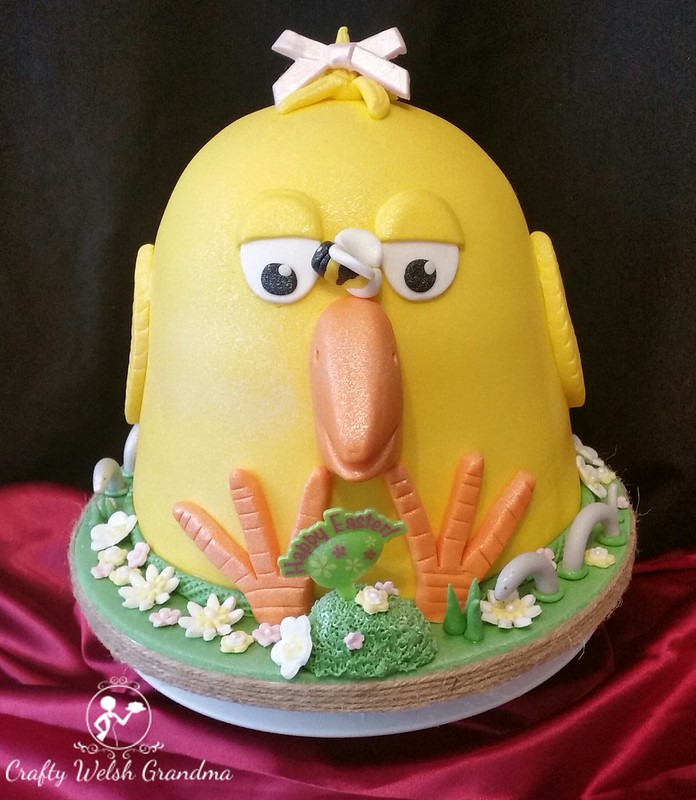
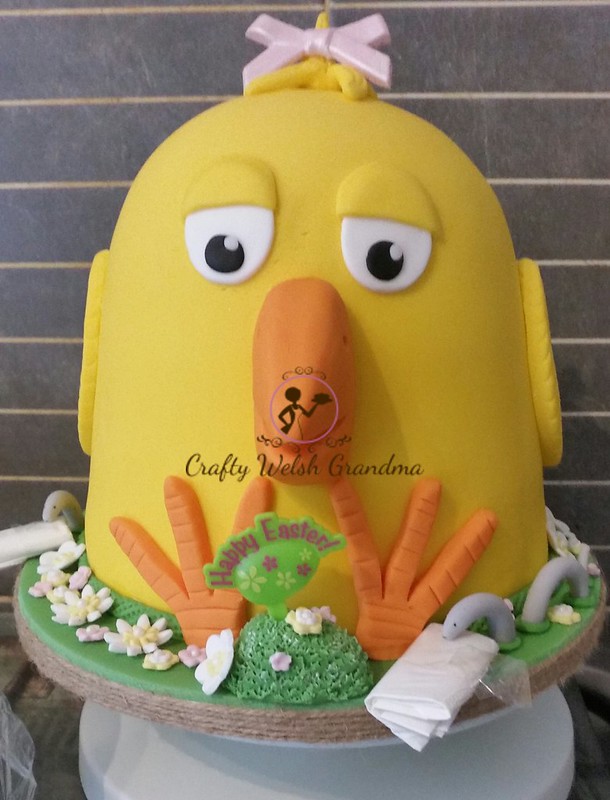
I was asked to 'do a cake for Easter' and given complete 'artistic licence'. I thought of the traditional Easter cake eg Simnel Cake, but then I thought "Let's look for some inspiration and have a little fun here" - So this beauty is, I guess, more of a Springtime Cake.

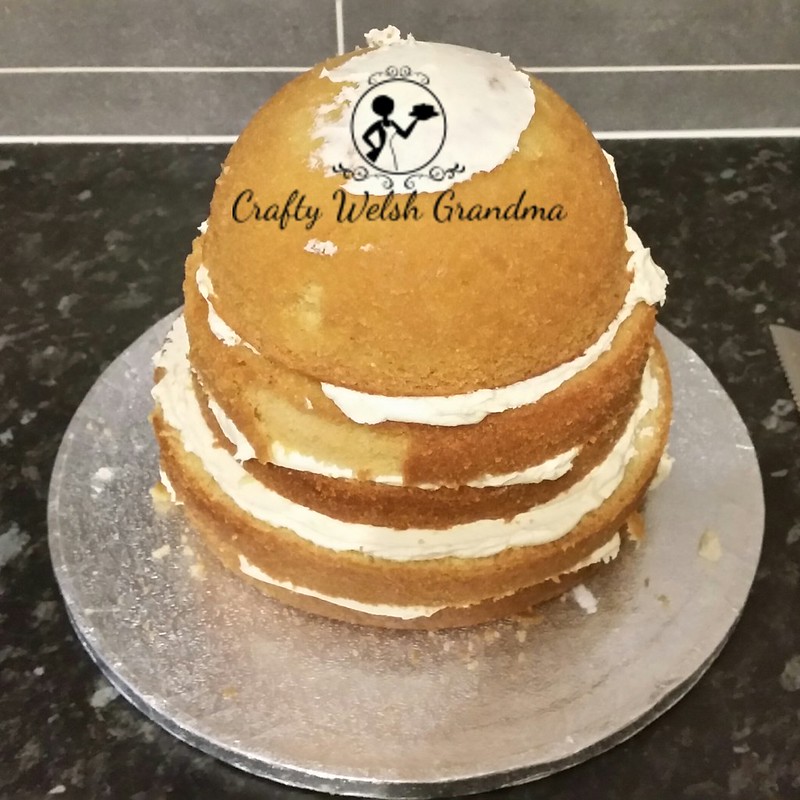
Using my faithful sponge cake recipe and basic buttercream, I baked and sandwiched 1 8" sponge, 1 7.5" sponge and a 6" dome sponge. It didn't look the best at first.


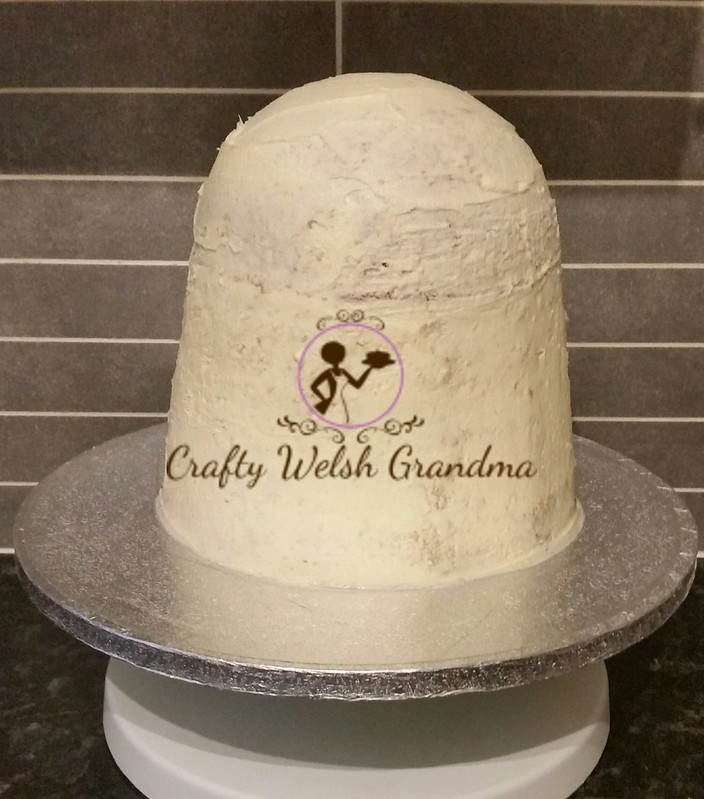
But once I trimmed and crumb coated it into a dome, it began to look a lot better.


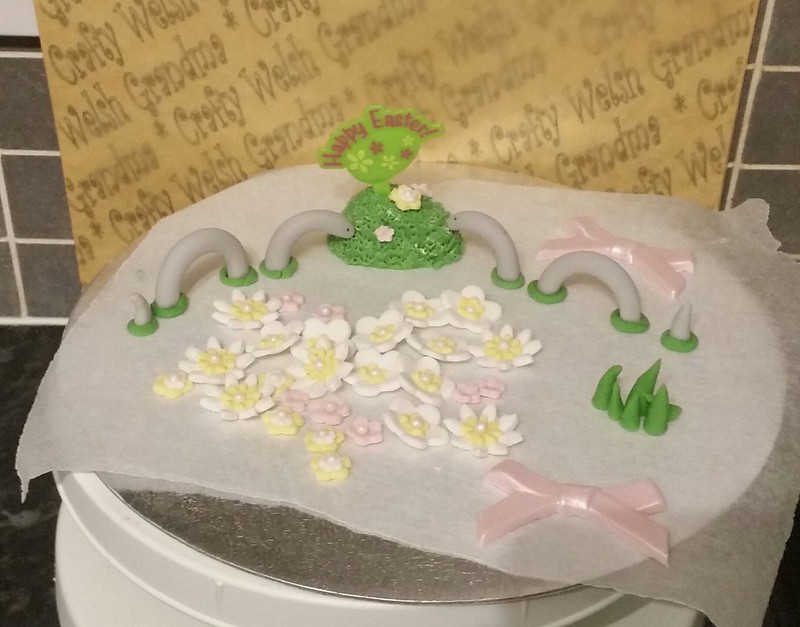
Whilst the crumb coat was drying out, I made some worms, grass and some spring flowers so they could dry out.
Here I go again with my seriously bad computer drawings lol

To make your worms: roll out a sausage shape and cut into one large piece, for the hump of the body, one medium piece, for the head portion and a small piece for the tail. Allow the two larger pieces to dry over something round so they will maintain their shape. Now the last piece, bring to a slight point. Allow to dry.


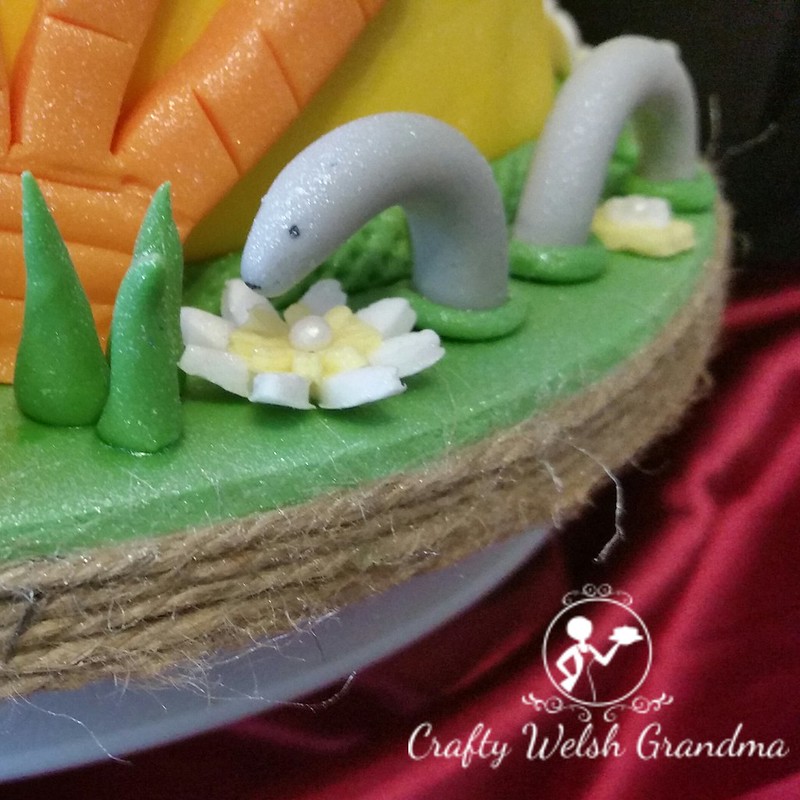
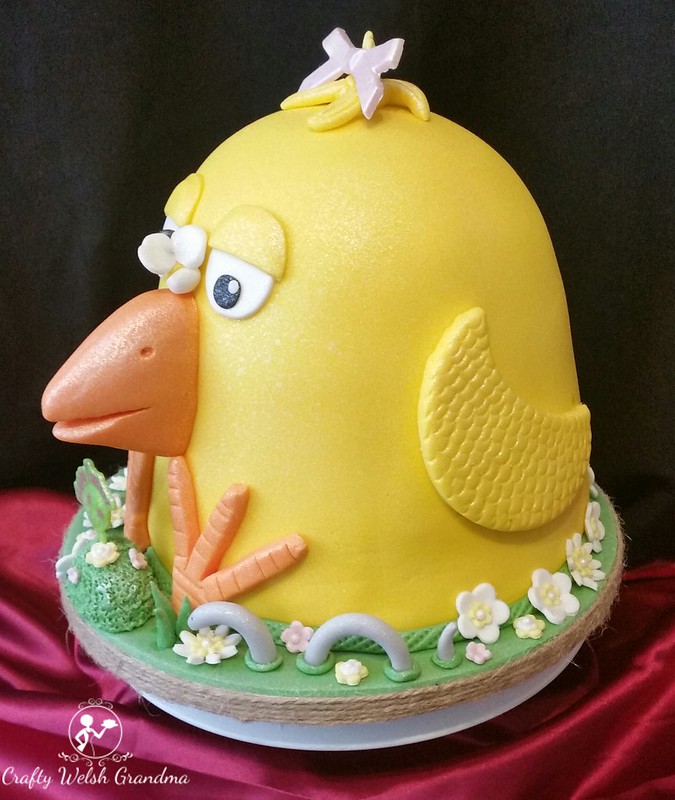
Once the cake had a second layer of buttercream and chilled a little more, I covered it in chick-yellow fondant, an orange beak and feet, then added the flowers and worms along the sides. The worms heads, in the picture below, had to be propped up with clean tissue whilst the glue dried to hold them in place.
To make the eyes: cut two circles in white and reform them slightly into oval shapes. Cut one yellow circle, do not reform into any shape, then cut in half.  You will notice that they are wider than the whites. Place onto the whites about 1/3 of the way, make sure the yellow comes over the sides of the whites, then smooth them down.

Next cut two small black pieces, shape into balls then squash into rounds for the eyes.  If you have small circle cutters, use those. Stick onto eyes. Add two tiny white flattened ball pieces to add highlights to the eyes
For the feet: roll out a large sausage shape in orange, flatten with rolling pin, gently add some lines across the whole sausage from side to side (opposite to those you see above). Do not cut all the way through.  

Now cut the sausage in two places, shown above, spread these out at smooth off the sides of the cuts.  This will now give you three toes

Worms drying out

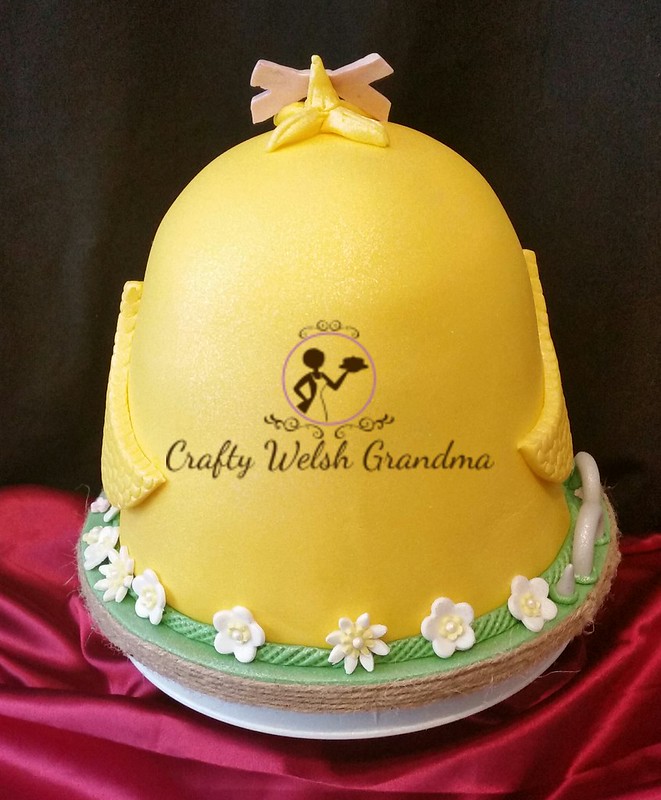
For the hair: roll out a long yellow sausage shape, cut into a number of pieces and bring one end to almost a point, allow to dry a little, glue to the top of the chick's head and shape.

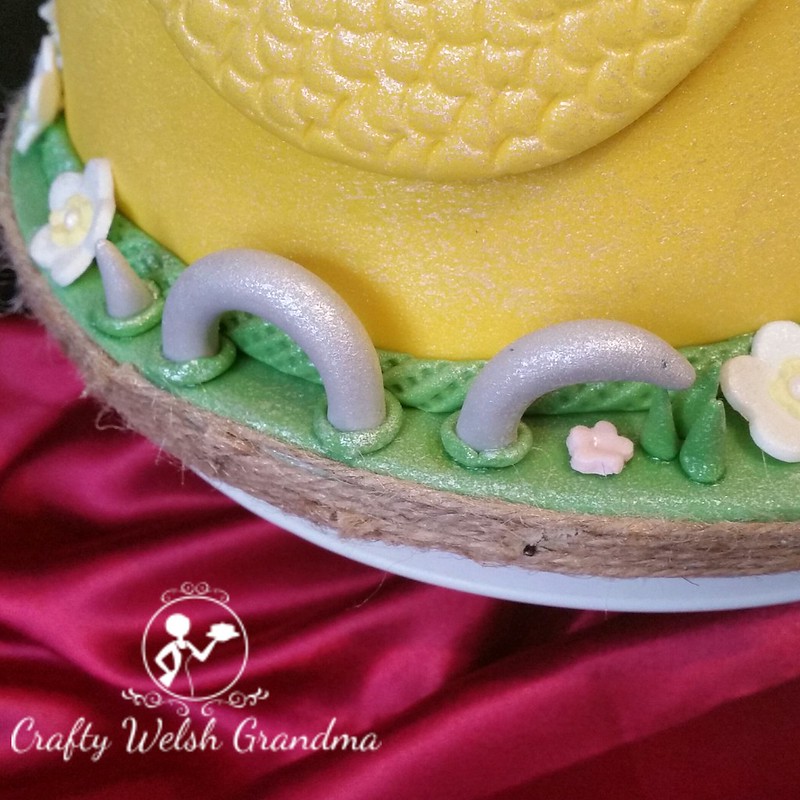
The wings on the sides were cut using a large circle cutter, the same cutter was used to take some un-needed fondant out to make wing shapes. I then used my scallop tool to make feather shapes on them both. 

Dried out worms and flowers

Following a little 'incident' with the corner of a cardboard box, right between the eyes, a little damage occurred! Bumble Bees are spring-time beauties, so I added one to cover the damage. It also added a little giggle factor to the sweet chick's face.


As I was coaching my daughter on how to make a sponge, I'd like to say thank you to her for making all the sponge mixes for this cake. She did an awesome job and, if I'm honest, you can't go wrong with a good sponge recipe.

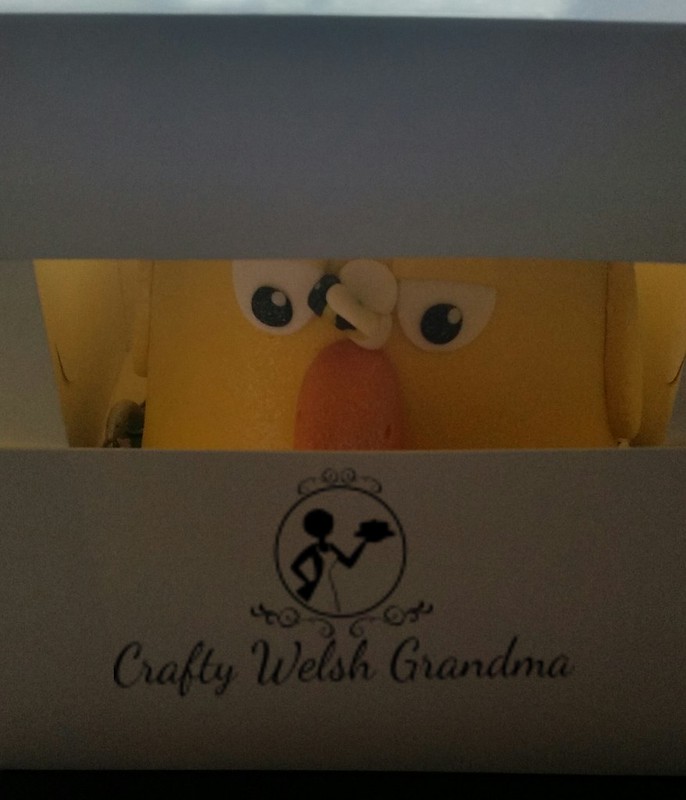
Just before I leave you, I just want to show you this image of how the chick looked in it's box. I made me laugh and I just have to share it with you.  The lighting is not the best as it was just a 'snap' image ...

Friday, 7 April 2017

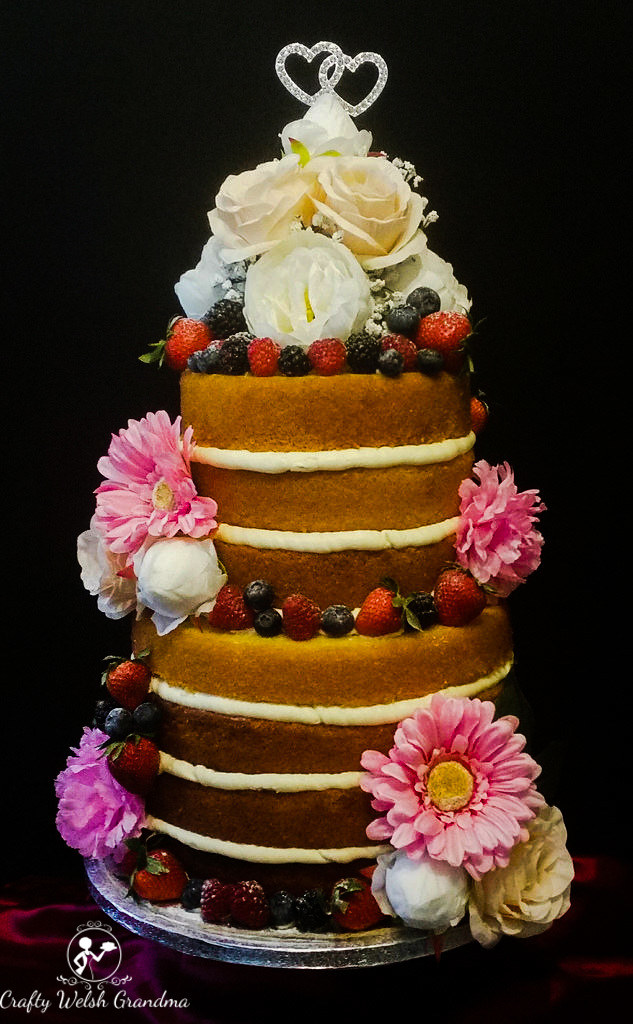
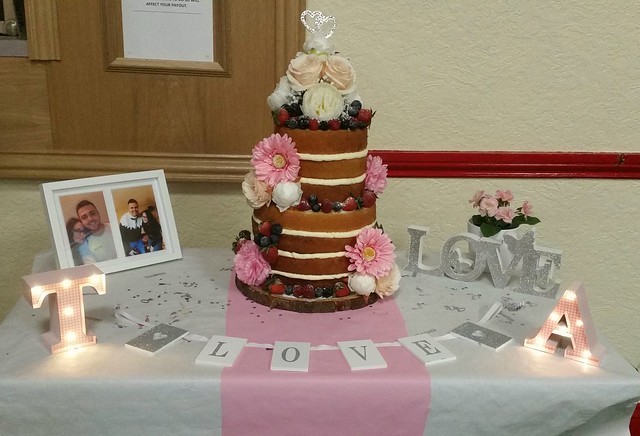
Naked Engagement Cake


I feel honoured to have been asked to make this cake! But at the same time, I felt petrified that I might get it wrong! Everyone told me "Just trust yourself, you can do it!"


Work in progress on the floral cake topper with diamante hearts.
A special thank you to my topper maker!

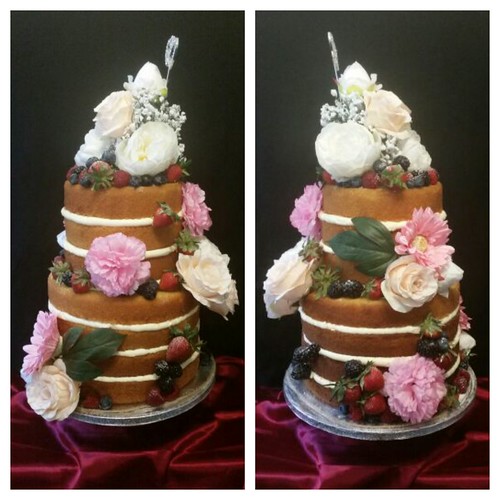
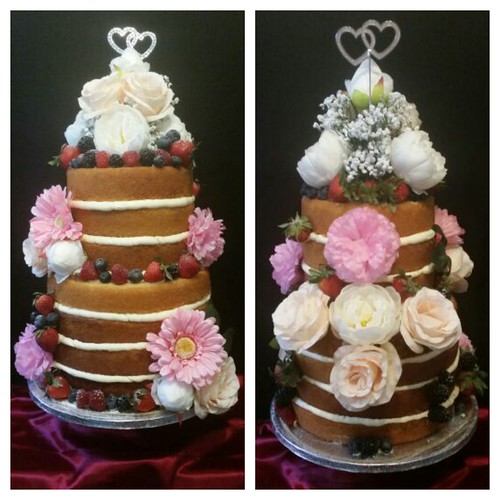
This type of cake does not lend itself to the heavy drapes of the fondant decorations. Instead, it's perfect for light flowers, fruits and berries. Unless the flowers are of an edible kind, I try not to use real ones on any cake. I'm always concerned that, if I haven't grown the flowers myself, they may contain traces of pesticides! So this cake's flowers are artificial, but the strawberries, raspberries, blackberries and blueberries are quite real!

Top (L) and (R) side views
Bottom (L) Front view (R) Rear view

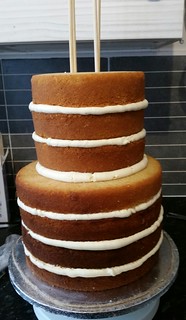
It's "back to basics" for this creation, even down to leaving on the caramelised outer layer. The basic sponge and buttercream have been delicately flavoured with vanilla, generously doused with simple syrup to stop it drying out, and that's all the intervention it had ... With the exception of buttercream whitener and then the internal dowels for stability and ease of transport.

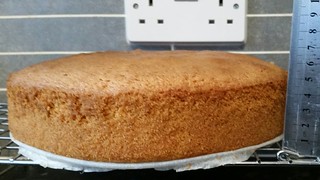
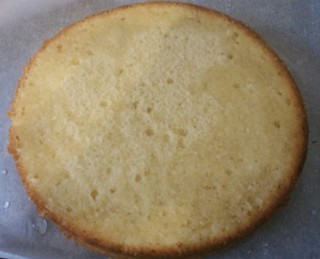
Just one of the seven layers before being trimmed

One of the layers being 'simple syruped'

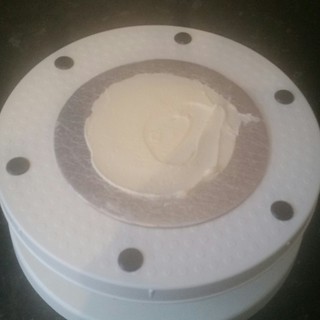
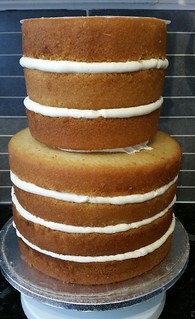
The top and bottom tiers were treated as two separate cakes. The top tier also has its own cake card. This was iced as a way of gluing the cake to it. The bottom tier is also on a card, which is stuck to a board in the same way,  This is because, when the cake gets to the venue, it will be shifted onto rustic wooden tree 'cookie' or board.


Each layer's buttercream was piped around the edges and then the centre was filled in.  This was done so that the buttercream you can see between the layers had a nicer finish than it if was spread.  This also helped reduce the risk of crumb contamination. 


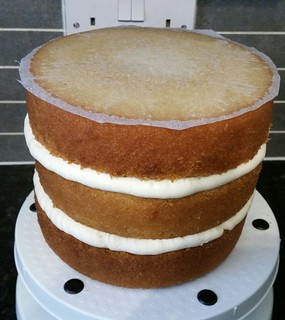
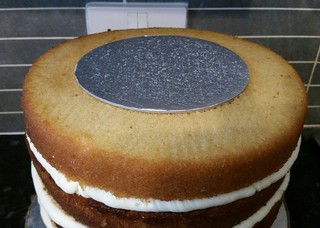
I left a disk of parchment paper on top tier as a way of preventing it from drying out. Then it was transferred to the refrigerator for some chill time


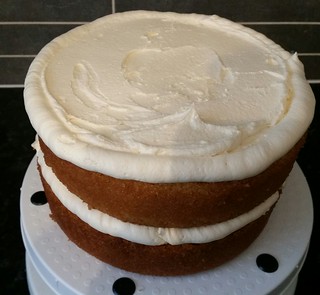
After the bottom tier had chilled enough so it could be handled, it was taken out of the refrigerator and prepared for the top tier.

Naked cakes are notoriously unstable at the best of times, to add a heavy tier onto this one was going to test every inch of my nerve and skill.

Tip for future self: When making a cake this tall, add an additional cake card in between the middle layers of the bottom tier. Also use bubble straws etc to support this layer.


The top tier's cake board is smaller than the cake, so I used one the same size as a guide for some buttercream and dowels. I gently scored the cake, it will not be seen as the top layer is slightly bigger.

I used an edible pen for this step.

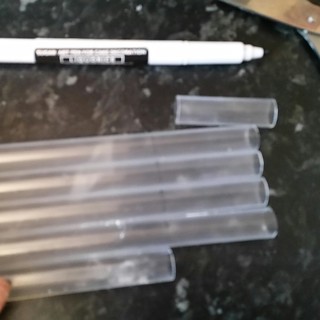
Tip: When cutting dowels or bubble straws, measure one and use that as a guide, By doing this, if your lower tier is not level, which I believe mine was, it will level out the cake.


Prior to inserting my bubble straws / plastic dowels into the lower tier, I added some buttercream to act as a glue for the next layer. I placed them a little wide so they would stabilise the upper tier by the card, and this meant I had room for the longer dowels later. 

Trust me when I tell you, I can;t believe I got it right in the middle - first time!

I cut my bubble straws a mm or two longer as I wanted to pipe some more buttercream between the tiers so it would not look out of place not having any. I also wanted this extra space to push in some flowers later.


My next task was to insert four bamboo dowels right through the centre of the cake and down to the bottom board. The image above shows them where they stopped at the board under the top tier. I positioned them, using my best guess, inside the plastic dowels in the bottom tier.


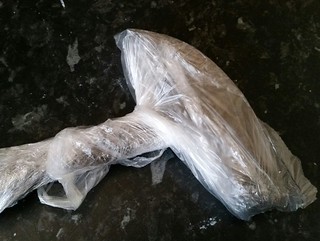
I used a pencil sharpener to make a point on the one end of each bamboo dowel to make it easier to hammer it through the card under the top layer. I had a new common DIY hammer and wrapped it in clingfilm and a food bag, just to be on the safe side.


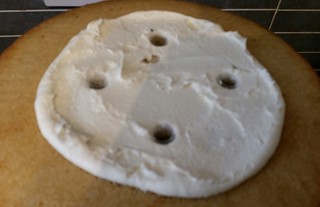
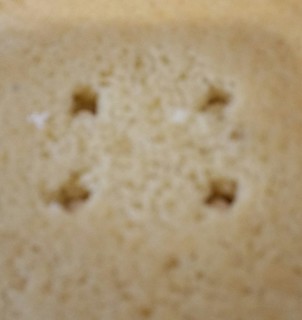
Once I felt the dowel go through the board below, I twist-pushed them as far as I could then used another dowel to push the one in the cake down to the bottom. All that's left is four holes in the top. 


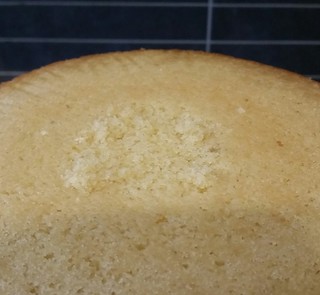
To hide the holes, I crumbled some of the trimmings into the hole, then replaced the parchment paper disk back on the top.


As you can just about see, the cake was transfered from the standard cake board to a rustic wood "cookie" board.

Thank you to my fabulous bouquet cake topper maker, who remains nameless. I couldn't have done this without you xxx

Friday, 31 March 2017

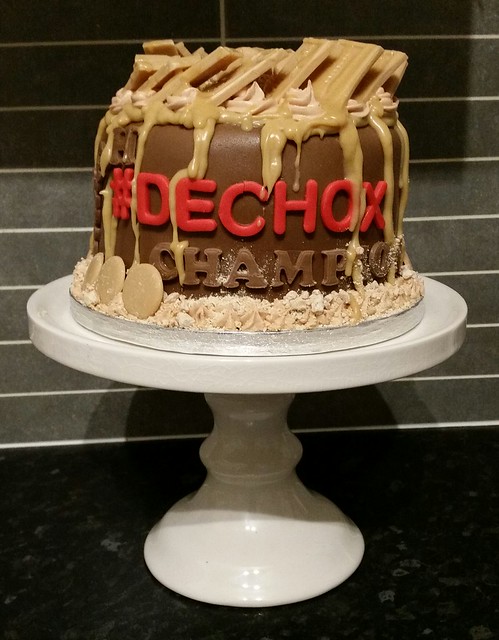
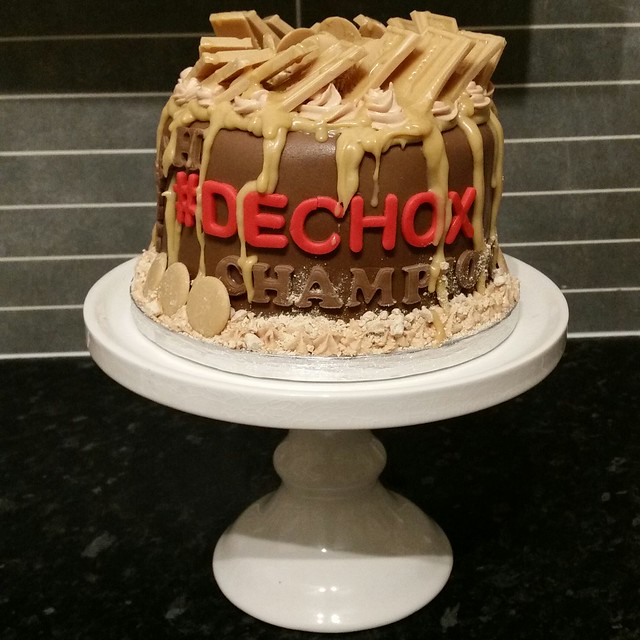
Caramac® Post DECHOX Cake


Made for a DECHOX champion! 

Every year my family and I indulge in a little fundraising. Previously, I have undertaken the DECHOX for the British Heart Foundation challenge, this is one of the charities that is very close to my 💖 - if you pardon the pun.

This year was different. I was not able to participate, simply because I have gone right off chocolate and related products. So I supported by good friend, Sarah, with hers.

For the month of March, Dechoxers abstain from all chocolate related products, which even includes the sprinkles on the cappuccino!

Click image above for
DECHOX information

As a post DECHOX "well done prize" I made Sarah a cake laced with Caramac, as she 'hinted' how much she liked Caramac.

For the sponge, I added caramel extract / flavouring simply because cocoa is too overpowering and I wasn't able to find a similar caramel product.

For the buttercream, I added the caramel flavouring as well as some chocolate coloured food colour paste.

For the ganache centre, I added Caramac instead of chocolate, this was also used to top off the cake

Note: Caramac is not as "solid" as chocolate and dark chocolate, you may need to adjust your mix by adding a little more Caramac into the ratio or slightly less cream.

The fondant is a blend of chocolate flavoured and white chocolate flavoured fondant. The same ganache as I used to sandwhich the sponges together was used to drizzle over the top and sides of the cake and the Caramac butter icing was piped around the top. Then topped off, once more, with Caramac pieces.

So, whilst I disappointed that I was unable to participate in 2017,  I'd like to encourage you all to support the British Heart Foundation and Sarah by either donating directly to the BHF here, or by using Sarah's JustGiving page.


Well done to all Dechoxers


Thursday, 23 March 2017

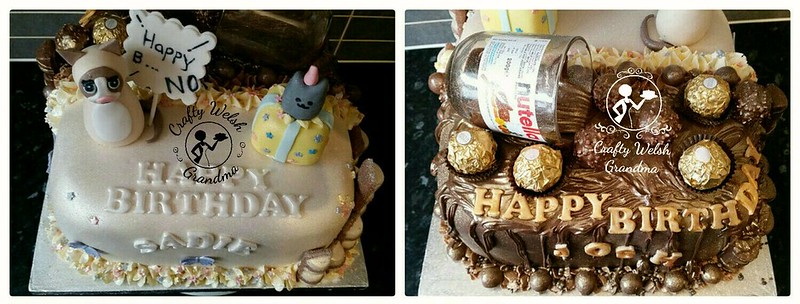
Nutella And Cat Joint Cake


There comes a point, I guess, when you can have too much of a good thing. I'm also guessing that, with their birthdays just two weeks apart, my niece and nephew felt this way about their birthday cakes


Last year they had a Rugby Player Cake and a Three Tier Unicorn Cake. This year, they opted for a joint cake.


My nephew asked for his "half" to be much the same as the Nutella Cake his cousin received last month - with chocolate sponge, ganache etc - whilst my niece wanted something a little more "simple". All she wanted was a gentle vanilla sponge decorated with her two favourite internet sensation cats - Grumpy Cat and Pusheen.


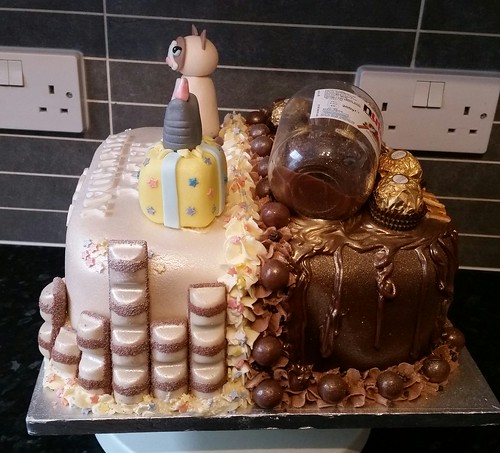
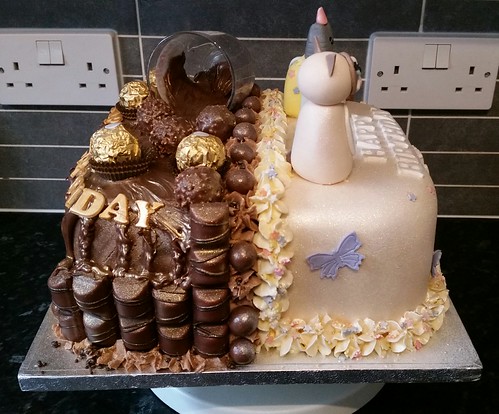
Each "half" was completely different from the other, which reflects my niece and nephew's differences in personality. Therefore, I made two different cakes and "spliced" them together to make one!


Making sure the height on both chocolate and vanilla sponges were the same, which would ultimately involve sandwiching them together with the same thickness filling, I cut the sponges in half and sandwiched them on top of the same flavour cake.

Each sponge consisted of a mix and a half of the recipe and baked in a 23.5cm square tin. As the mix was larger, I decreased the temperature down to gas #3 and baked slowly for at least an hour each.


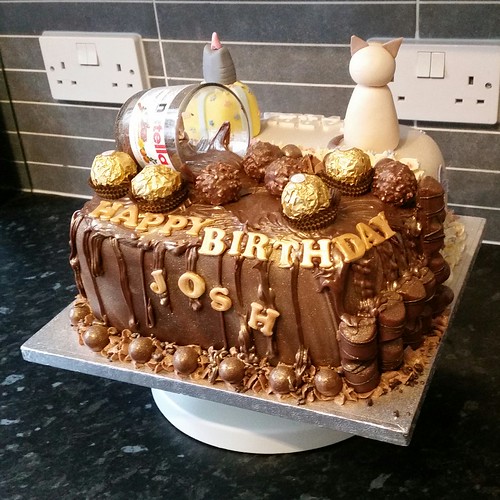
The Nutella half had the Nutella / chocolate sponge and was sandwiched together with Nutella ganache and crumbcoated with chocolate and Nutella frosting as well as the remaining ganache that I could't get in the cake. Whilst ...


... The vanilla half had a simple vanilla sponge and was sandwhiched together with basic vanilla buttercream and crumbcoated with the same.

Both halves required all sides to be crumbcoated to ensure the bare edge of the sponges would not harden when exposed to the air.  I also added a sprinkle of simple syrup, just to be sure

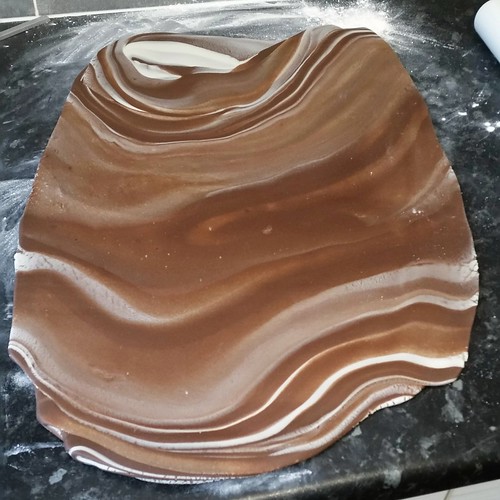
The Nutella half was covered with a marbled mix of Renshaws chocolate flavoured fondant and Renshaws white chocolate flavoured fondant. I'm not quite sure what happened with the marble effect, but it didn't turn out as awesome as I'd hoped. But it's still awesome I think.


For the vanilla half, my niece wanted the Renshaws white chocolate flavoured fondant.


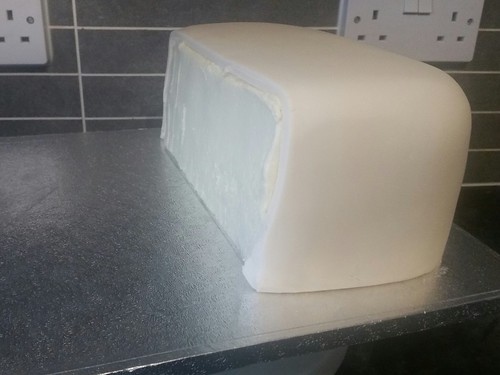
Up until now, both halves of this cake have been treated as two individual cakes, so a very sparing spray / sprinkle of simple syrup was used to join the sponges together inside and some edible glue was used along the raw edges of the fondants to encourage those to stick together.

The "tricky" part here, I guess, is the fact that the niece wanted no part of her brother's decoration to accidentally find its way over "her half". With this in mind, I pipped on the joining edge with each flavoured frosting on the correct side of the cake. This was to ensure that the Nutella would not encroach onto the vanilla side! Both my niece and nephew were enlightened to the fact that the very centres would be edged in their own frostings and that these would be touching each other. I couldn't see any other way around it. With the exception of a cake card in the middle, and I didn't want to go down that route.


The 'Happy' on this side refused to slide down the side like the 'Birthday' and my nephew's name. But it's refusal to 'conform' has not ruined the overall effect.

The Nutella side was generously doused with gold dust, topped with Ferrero Rocher, some open, some wrapped.  The pipping was topped, alternately, with Maltesers plus some chocolate covered popping candy then a few sticks / chunks of Kinder Bueno were added to the sides for decoration.


The vanilla side was doused in silver dust with an added "something" (see below).  The piping on this side was sprinkled with sugar stars and some white Kinder Bueno was added to reflect her brother's half. Oh! Plus one or more purple butterflies.


At a staggering 15.4lbs in weight, I guess all that's left for me to say is ...
Happy Birthday both of you
Related Posts Plugin for WordPress, Blogger...