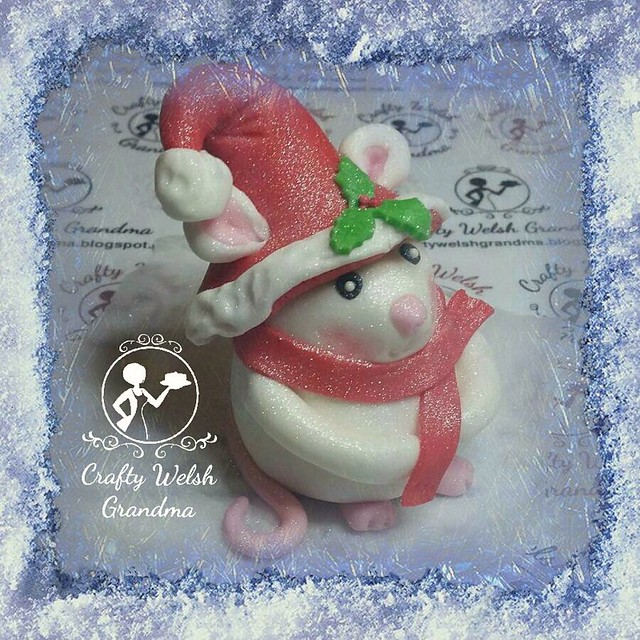
'Twas the night before Christmas when all through the house,
Not a creature was stirring, not even a ...
Due to some camera and phone issues, I'm not able to bring you a pictorial step by step how to for this project.
However, as with my previous projects, they are all basically the same except, for this one, I made the head and body out of one piece of fondant. If you check out the Festive Fondant Index and have a look at the Gingerbread People, this will give you a good idea.
You will need:
- White fondant
- Red fondant
- A tiny bit each of black
- Some pink fondant
- A little green fondant
- Edible glue / water
How to:
- Roll out your ball of white fondant, ensure it is fatter at the bottom.
- Lay your work on its side or horizontally
- About 2/3 of the way up, using your finger, gently roll the ball with your finger only, pressing in to make an indent for a neck.
- If you find this two difficult, check out the Gingerbread People blog entry and make the body and head in teo pieces.
- Stand upright and insert a piece of spaghetti (if the topper is going to be eaten, or a cocktail stick if it's going to be kept for decoration.
- Shape the front of the top 1/3 of your work to a delicate point, for the mouse's nose.
- For the eyes - Make indents it the face for both eyes and a nose.
- Roll two balls of black fondant and drop these into the two indents you've made for the eyes.
- Add a highlight using a tiny ball of fondant.
- for the nose -Use the same process for the nose as you did for the eyes
- Make two indents into the bottom of the nose for the nostrils
- Now add a line from the underneath of the nose down to where you want the mouth to be.
- Make a mouth shape using a scallop tool.
- For the arms - Roll two thin sausage shapes and fix to the body near the neck and bring them down to the fron of the body
- For the feet - Take two small balls of pink fondant, roll them into tubes and flatten.
- Add some 'toes' using a blade tool
- Fix these under the body
- For the tail - Take the same pink and roll a ;ong, thin sausage shape.
- Fix under the back of the body and then shape into a curly tail.
- For the hat - Roll a cone shape of red fondant
- Make a dent in the bottom
- Shape so that the brim is bigger than the mouse's head and ensure it is in proportion.
- For pictures, check out the Gingerbread Person blog entry
- For the brim - Roll a long, thin length of white, flatten, add some indents to simulate fur.
- Glue to the brim
- For the ball - Add a 'fluffy; ball to the point
- Fix hat to head
- For the ears - Roll two balls of white fondant and flatten
- Add two smaller pink balls to the centre of these and flatten.
- Using a ball tool, make two indents into the hat where you want the ears to be
- Pinch the bottom of the ears and fit the pinched portion into the holes.
- Add a sprig of holly to the hat with some red berries
- For the scarf - Roll out a length of red fondant, cut to the width you need
- Check against your work for the length and trim
- Fix around neck
- Sprinkle with some festive magic - edible glitter
- Allow to dry


No comments:
Post a Comment