
My kids seem to love my carrot cake, and one of them always loves his birthday cake made from carrot cake. His cake for last year was a 24 Carrot Gold Cake, which he loved. I had to top last years, somehow!
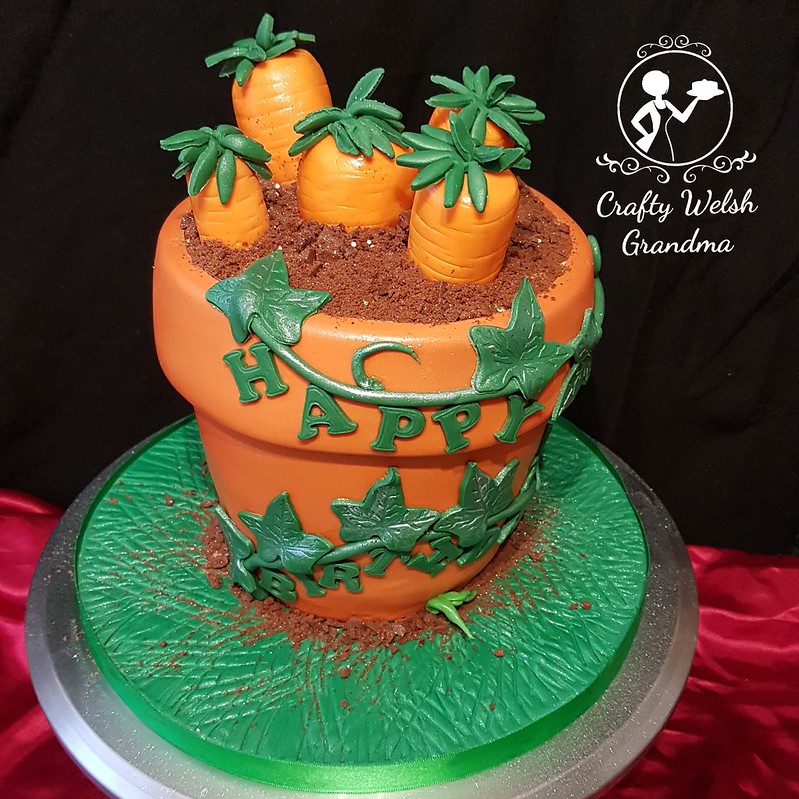
For this cake, I decided, keeping with the theme of carrots again this year, to do a plant pot with carrots growing in it.
I baked 3 6" carrot cakes, doubling up on the mixture here, I divided it equally between the three tins to ensure that all cakes were the same size.
Once they were topped off and divided into two layers, I trimmed them down, whilst upside down, from 4" down to the 6" edge at the bottom. I kept the 6th layer for the very top.

I coloured my fondant with a terracotta colour for the plant pot. What I should have done here it place a cake card in the middle of the layers and used some bobble tea straws to stabilise it, you will see later that it started 'listing' to one side due to the weight! Don't make the same mistake as me!

Once it was covered in the fondant and allowed to dry out a little, I flipped it over so it was the right way up. Prior to doing this, I covered the cake board with green fondant to simulate grass.
Once the cake was in this state, I used the same buttercream, as I had used between the layers, for the top, then placed the last layer on and crumb coated that, carefully. I made a mistake and got some over the sides of the pot at the top, so I wiped it off with clean cloth.

Once it was ready to be covered, I rolled out a thicker length of fondant. Enough to go all the way around and about 1cm taller than the cake top. About 5mm of it was stuck to the side of the pot with piping gel.
The carrots were made from orange fondant. I rolled it into carrot shapes and cut the bottom flat, they didn't have to be straight, just flat. I made some marks down the length of the carrot, inserted a cocktail stick and pushed it into the cake and buttercream. I made five of these. Far less than I made for last years cake. The green leaves were made using a large daisy cutter and rolled around, pinched on the bottom and inserted into a hole I had made in the top of the carrots.
I used Bourbon Biscuits for the 'dirt' in the pot.

I split them in half to remove the cream inside, once the cream was removed, I placed the biscuits in a bag and gave them a good bashing!
This was then spooned onto the top of the cake
As this cake was garden related and for my son, I was stuck as to what colour to use for the decorations!
Eventually, I opted for a green ivy decoration. I needed it to be as 'organic' as possible. The 'Happy Birthday' was placed to look like it was hanging from a vine.
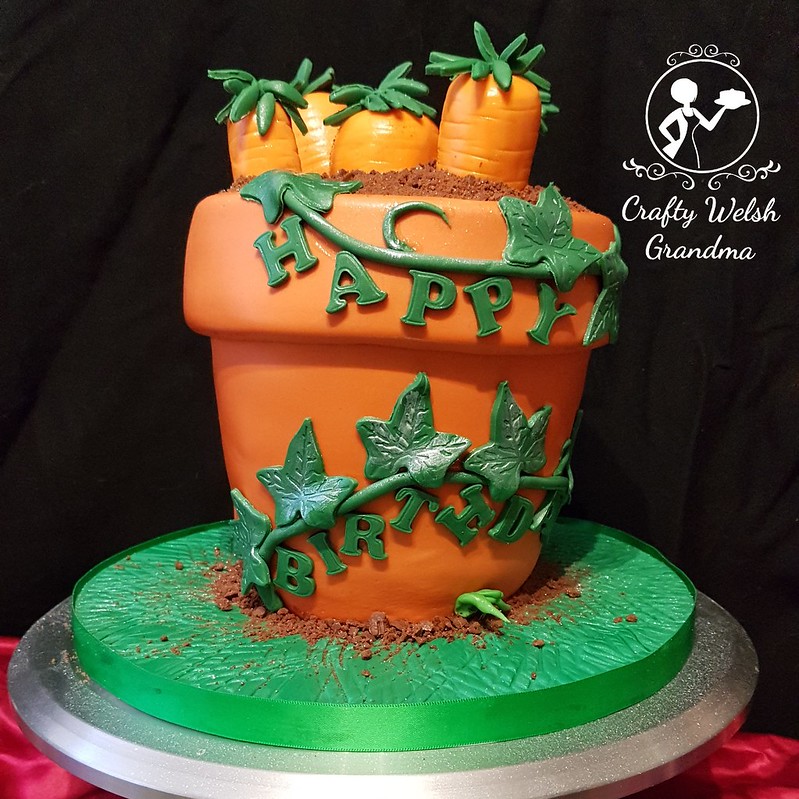
The ivy leaves were given a little brush with some silver edible paint, for highlights and then some extra 'dirt' placed around the bottom of the pot and a few blades of fondant grass.
Having done all of this, and with my son's birthday on the 3rd of March, I just hope I can make the few hundred mile journey. Not only is it rather unstable, being smaller on the bottom, but we have a severe weather warning and quite simply, can't get out of the street, let alone make the journey to have the day with my son for his birthday!
I just hope I can get there, if not, have a hap[y birthday anyway son xxx
This cake was inspired by a plant pot project that my caking hero, Yolanda Gampp, created, see here
This cake was inspired by a plant pot project that my caking hero, Yolanda Gampp, created, see here

You compose this post cautiously I think, which is effectively reasonable to me. This, however another post is likewise acceptable. As a beginner, this data is extremely useful for me. farm boxes
ReplyDelete6343FFBE53
ReplyDeletekiralık hacker
hacker arıyorum
kiralık hacker
hacker arıyorum
belek