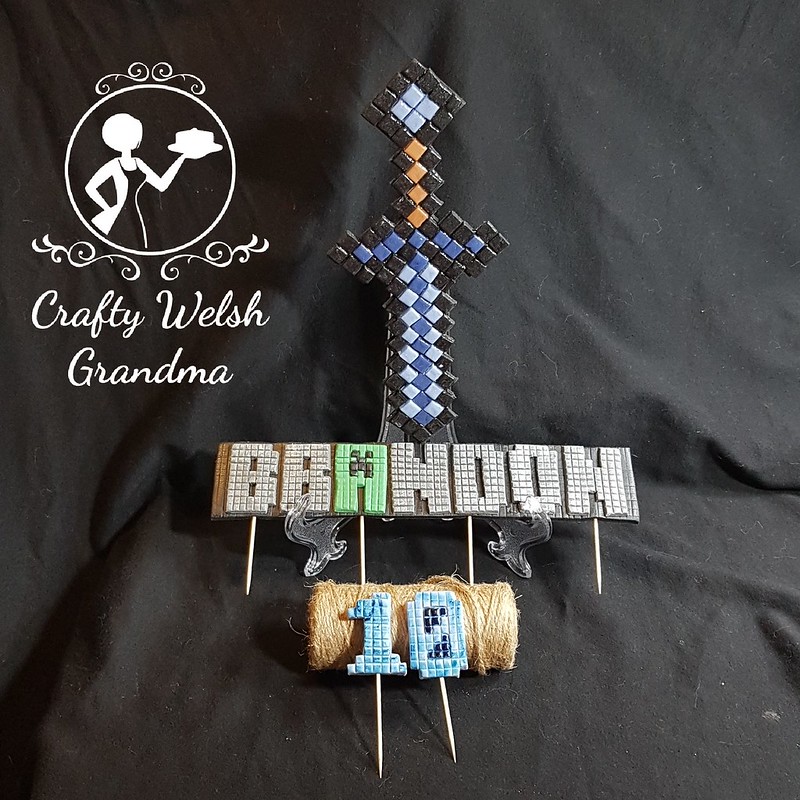
I'm not a Minecraft fan, but, by the time I get to finish this cake, I will be totally Minecafted out!
So when the Grandson will be reaching the realm of a double figured age, this Grandma had better come up with the goods for what is his 'in thing' for this year!
His previous cakes have been:
- For age 9 - A red football cake
- For age 8 - Sonic the Hedgehog cake
- For age 7 - A giant cupcake with mini matching cupcakes
- Previous years cakes were mostly shop ordered
For the Minecraft Sword, please see here for a detailed entry.
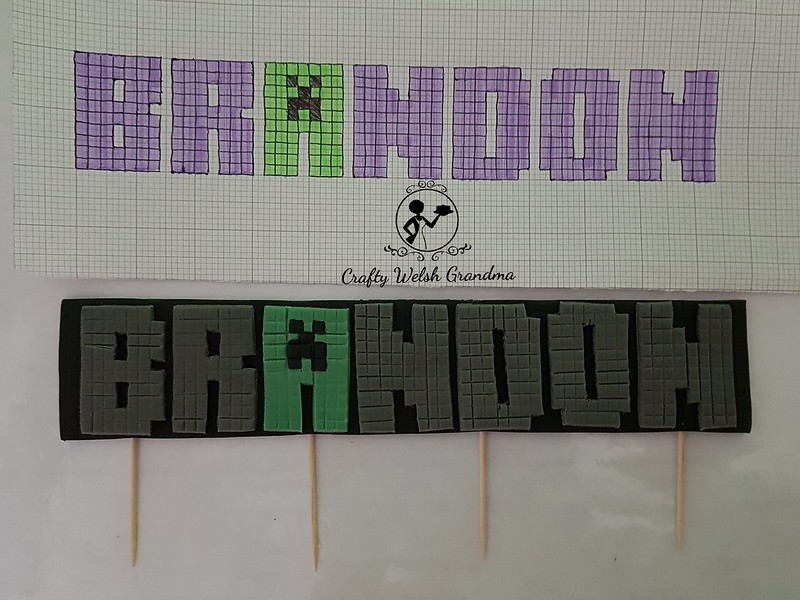
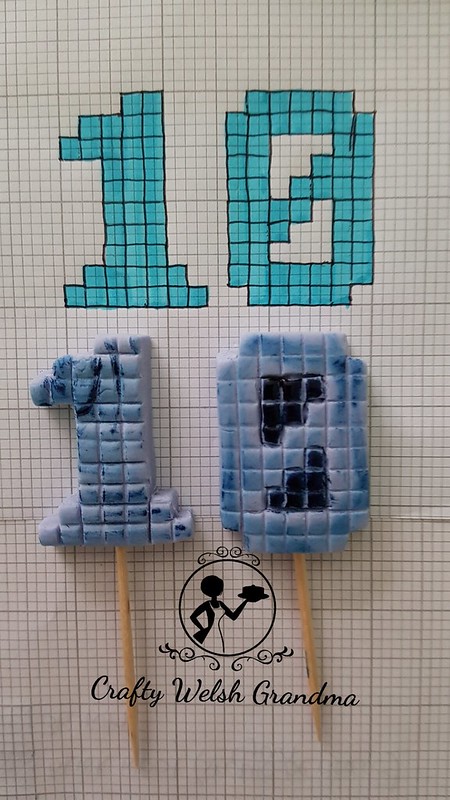
For the name and age, I had my daughter-in-law-to-be prepare some drawings on graph paper for me. If you don't know why the Minecraft stuff looks like this, see here.
To ensure I obtained the pixelated / squared look, I needed the rolled modelling fondant to be impressed with tiny squares, which would also help me get it right.
I have a kitchen board that has small squares on the underside, I used this before when I made the PJ Masks Character Faces. It worked great then, so I'm using it again for this.
I rolled out the fondant, for the name, to 1mm thickness, impressed the squares and cut each one, following the graph paper design. The Creeper in the letter A was hard because I had to cut out the eyes and fill them in with black. But, as you can see, they came out half decent.
For the black background, I rolled the modelling paste out to 2mm thickness and, again, impressed with the squares. I was then able to ensure that the letters were lined up. The letter A went a bit mis-shaped, but I don't think the big guy will mind on the day.
The letters, once stuck on the trimmed background were then dry brushed with white food colour gel to lighten them and give them a stone look. The four cocktail sticks will be used to affix this to the top of the cake.
The numbers were made using the same method, only this time, they were rolled to 5mm thickness. It was difficult for me to cut the inside of the 0 out. To get the cut-out look, I painted them using navy blue food colour and added a little dry brush of the same.
Once all these pieces were dried enough, they were sprayed with edible glaze and placed in my makeshift drying box. After all, I don't need them until May, but this was only supposed to be a practice. However, they've worked so well, I'm going to keep them moisture-free and and in an airtight container until then.


AFAA895CF3
ReplyDeletehacker kirala
hacker bul
tütün dünyası
-
-