
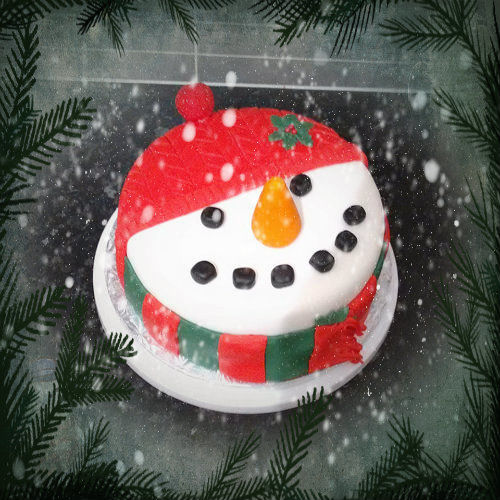
Whether you bake it or fake it - try this for something a little less traditional for your festive cake. This looks a little more complicated written down that it actually is, once you've read it through, it becomes clearer
If you want to bake your own cake, try my Rich Fruit Celebration Cake or the Easy Carrot Cake recipe
You will need:
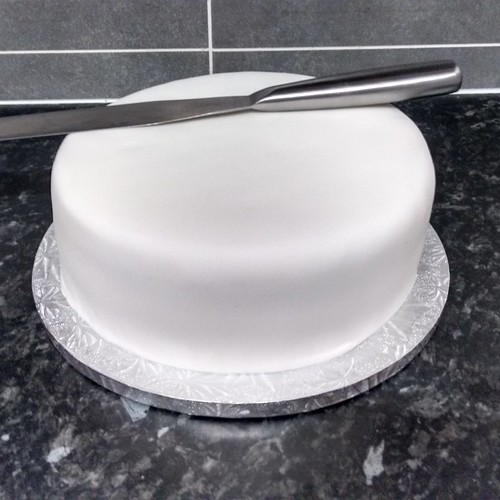
- A round white iced cake, any size
- If you baked your own cake, or if your cake didn't come with one - a cake board at least 2" bigger than your cake
- Black and orange fondant
- An additional two colours of your own choice. As a main colour I used red (#1) and the second colour I used was green (#2)
- A little powdered icing, mixed to a thick paste to use as a 'glue' or some white buttercream
- A pizza type / wheel cutter
- A ruler or something with a straight edge
- A cakepop stick or cocktail stick
- Some coloured decorating sugar that matches fondant colour #1 (optional)
How to:
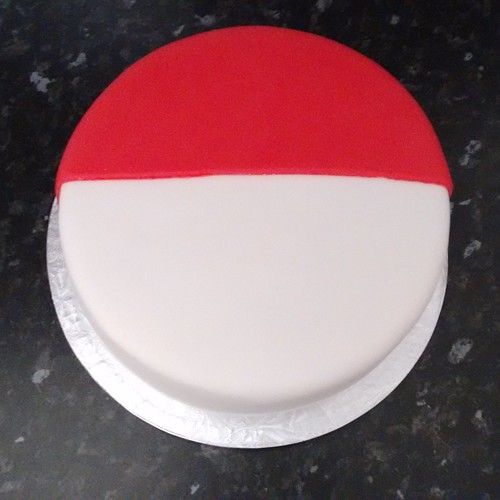
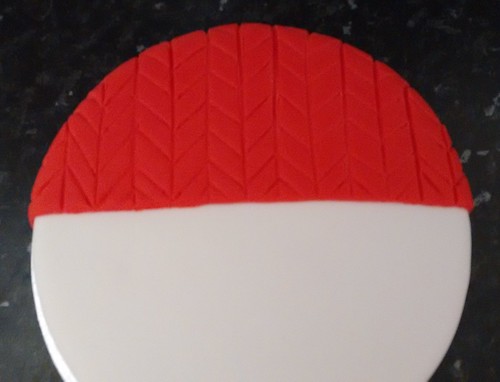
Roll out your main colour #1, dampen your cake, to act as a glue, and fix to less than half of your cake. Smooth off.
To take away the freshly cut edge look, run your fingers gently over the raw edge.
This is going to be the bobble 'hat' or 'beanie'
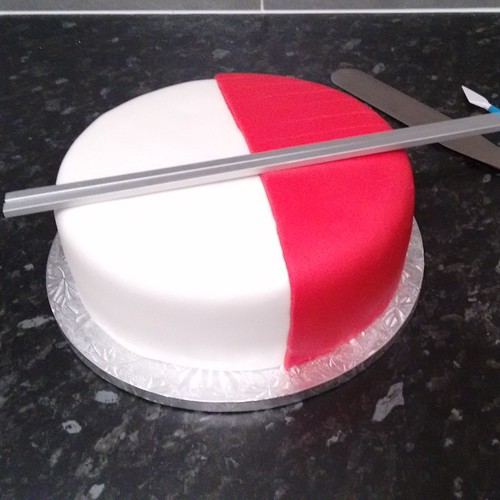
Use your ruler or straight edge, mark guide lines at regular intervals. Use the blunt edge of a knife to score, gently, over these lines to make it look as though the 'hat' is knitted.
Next, roll out a thin band of fondant colour #1 and fix to the edge of your 'hat'. This will make it look as though the knitted bobble hat has a turn up.
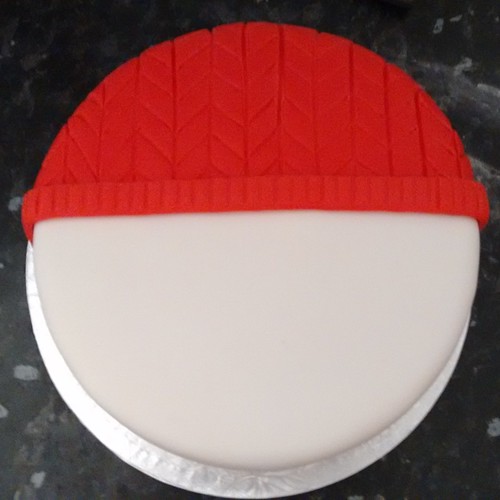
Soften the raw edges with your finger
Score at regular intervals to make it look like knitted rib.

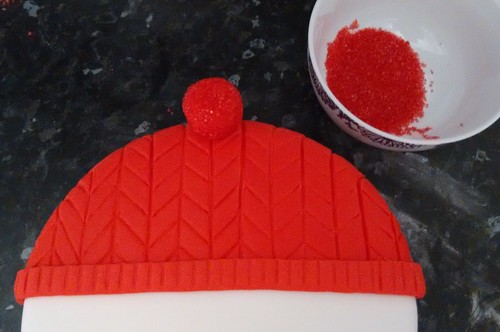
Roll a ball of fondant colour #1 into a ball, cover in decorating coloured sugar and gently push into the cakepop stick or cocktail stick then take it off again.
If you cannot find a suitable colour sugar for your bobble, prick the bobble with a toothpick or with a star piping nozzle
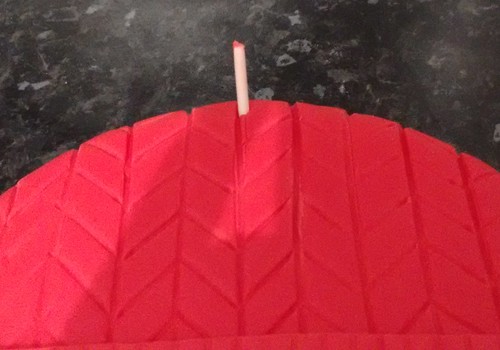
Take your cakepop stick and, on the very top centre of your cake, push it in, leaving enough to affix the bobble back on. If it's too long, trim to size. You don't want the stick to poke out of the top of the bobble.
The Nose:
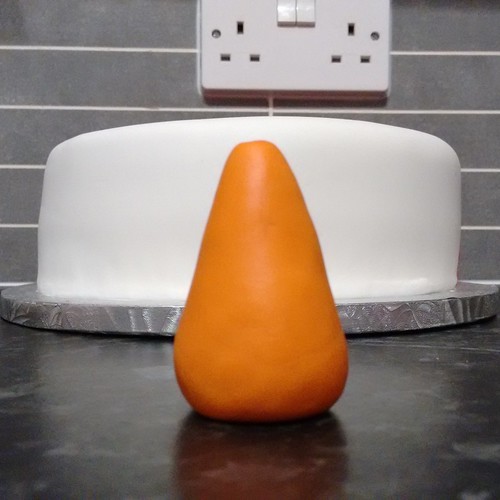
With your orange fondant, roll and shape a cone.
Using the back of a knife, score into it so it looks like the ridges on a real carrot.
It doesn't have to be perfect, after all, what's wrong with 'ugly veg'?
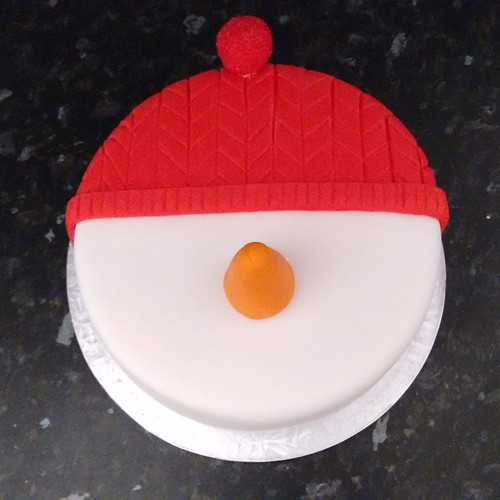
Before 'gluing' onto your cake, place the fondant carrot on the cake. If you are happy with the positioning, use a little icing, and your best 'eye', fix to your cake - don;t forget, we have eyes to go on too.
Pieces of coal or pebbles / stones:
Roll out your black fondant and cut into eight pieces
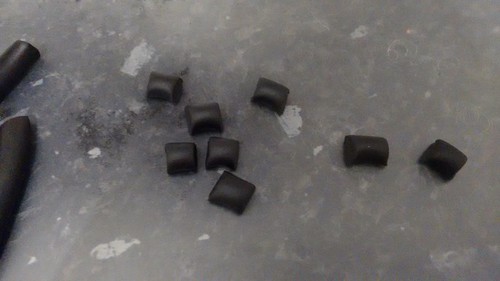
Gently mould the pieces to take away the raw, cut edges.
These don't have to be perfectly round because pebbles or pieces of coal aren't perfectly smooth or round
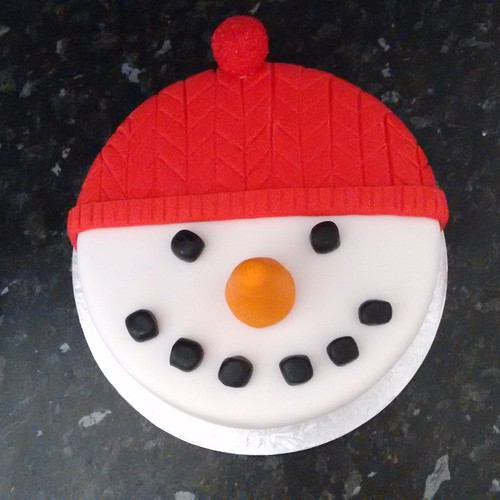
Fix the pieces to your cake for eyes and a mouth
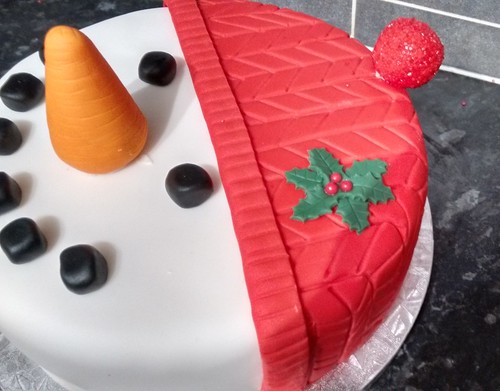
It was about now that I decided that Frosty the Snowman here, needed a little festive holly on his bobble hat!
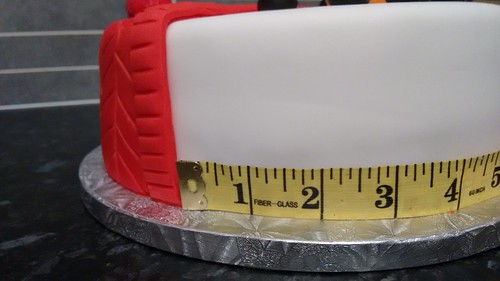
Measure the white portion of your cake, from the bottom of the hat on the one side to the other. Add about two inches to this number.
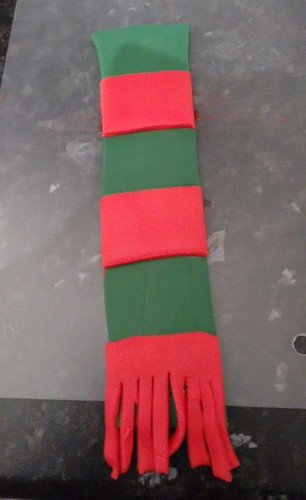
Roll out fondant colour #2 to the length you require and trim the sides so they're straight. Cut in half so you have two shorter lengths.
Roll out fondant colour #1 and cut stripes to fix onto your scarf.
Add and extra piece of colour #1 onto the ends and cut into a fringe.
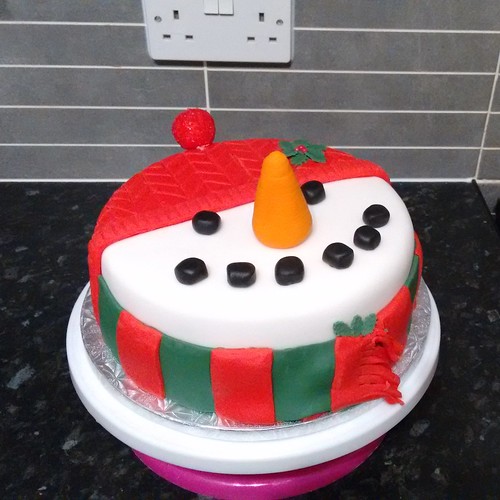
Starting from the bottom on the bobble hat, fix one side and leave fringes hang free.
The do the same to the second side.
Tidy up the fringes so they look windswept.
Fixing the scarf to the snowman, once again, doesn't need to be perfect. I have yet to see a perfect knitted scarf on a real snowman, so if i looks scruffy, that's brilliant.
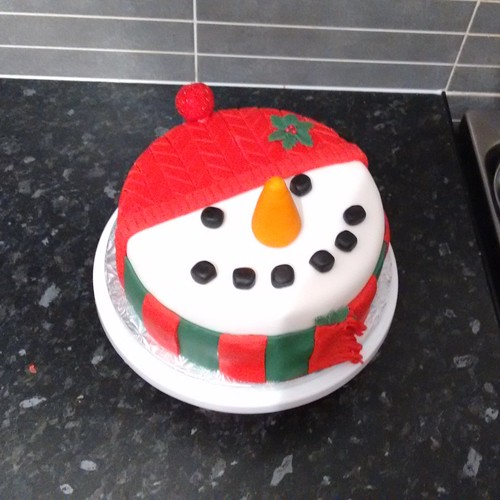
Sprinkle with some edible glitter to give that extra look of frostiness


Featured Post

4FD015BC82
ReplyDeletekiralık hacker
hacker arıyorum
belek
kadriye
serik
Just made your snowman Christmas cake. Very happy with the result. Thanks for the idea. 😊
ReplyDelete