Saturday 24 December 2016

Fondant Snowman


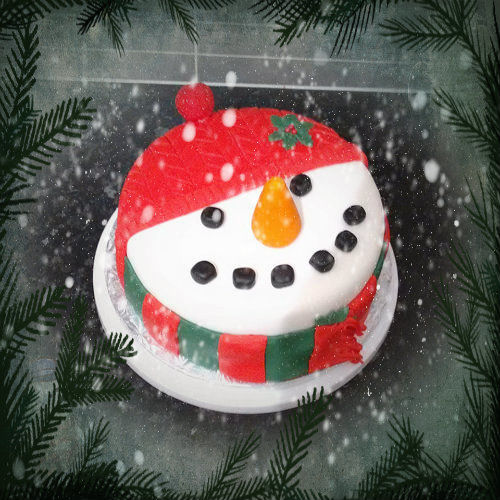
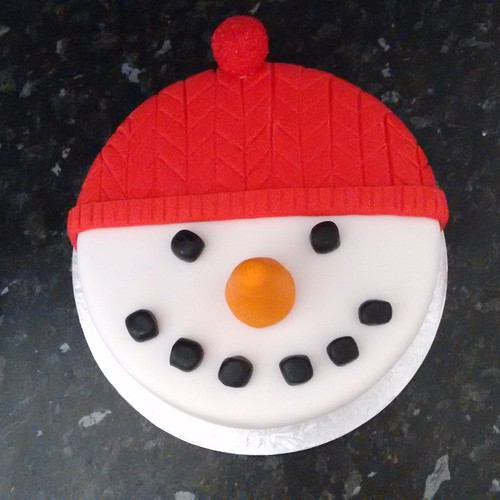
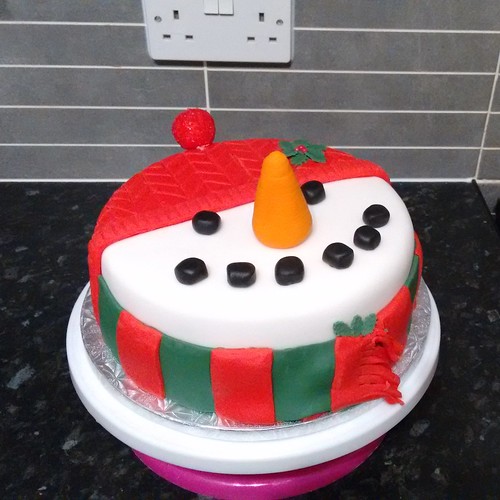
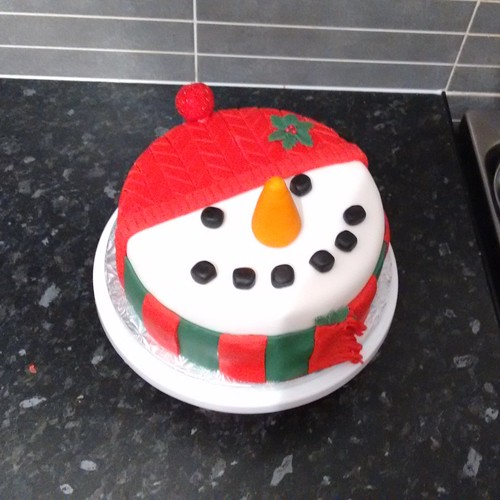
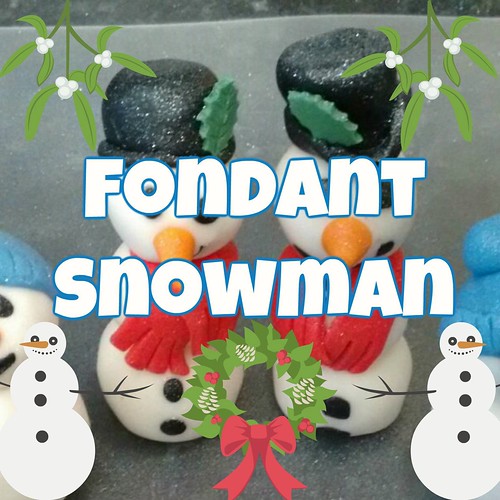
My niece, Sadie, and I had a little spare time yesterday and made some fondant snowmen, I promised her a showcase and here it is
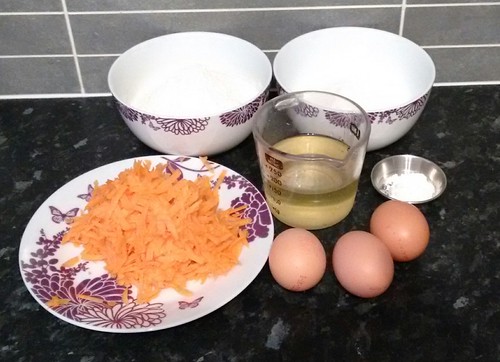
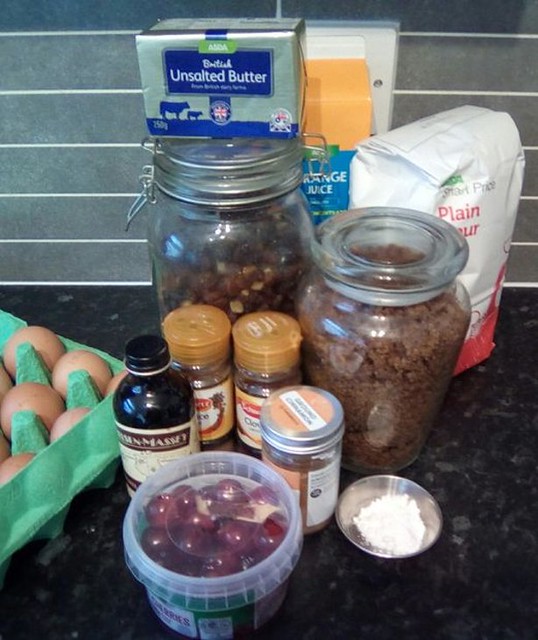
We used:

We used standard fondant, not modelling fondant
  • Three balls of white fondant (one a little bigger than the rest)
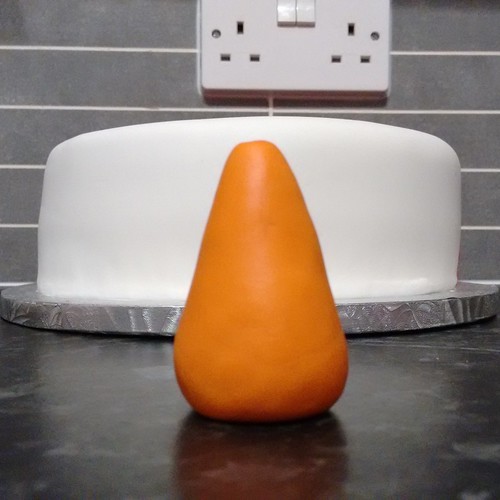
  • One small piece of orange fondant shaped into a cone for his carrot nose
  • A length of red fondant for his scarf
  • A small bit of green fondant for a holly leaf
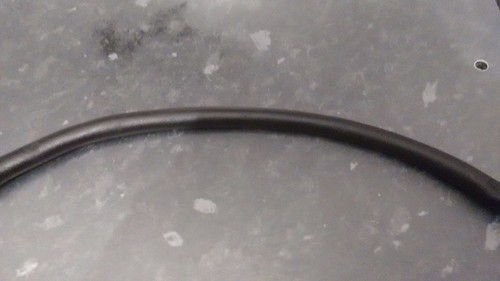
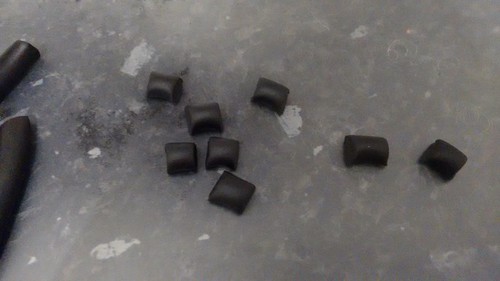
  • Some black fondant, one skinny sausage shape, about eight tiny black balls and one big black ball
  • A cocktail stick
  • And some edible silver glitter
Bottom Ball:

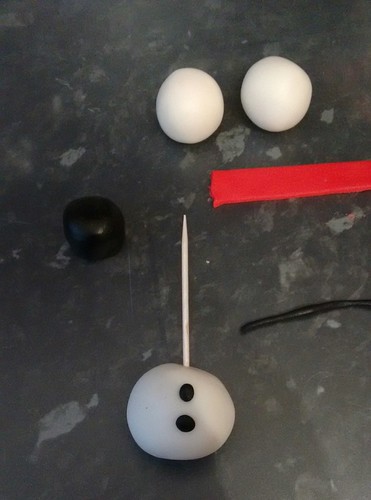
Use the biggest of your fondant balls

We found it easier to poke little holes in the front of the body, we then glued two little black balls in and then we then squished them in a little.

As you can see, they are out of shape, but stones and coal aren't perfect.

We then placed the cocktail stick in the middle and stood it upright.

Middle Ball:

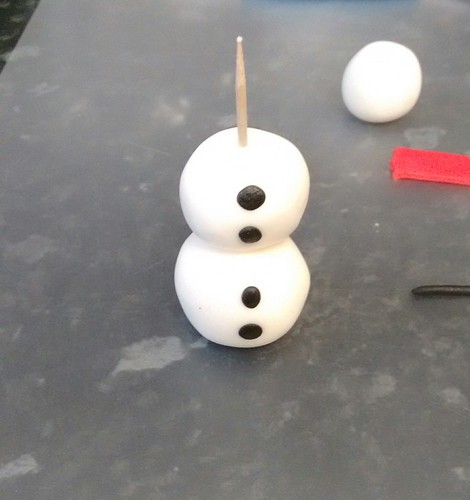
Made in exactly the same way as the bottom ball. Then we placed a little water on top of the first ones to act as a glue for the second one, then we carefully placed the second ball on the cocktail stick.
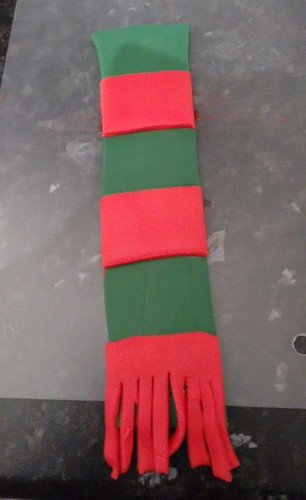
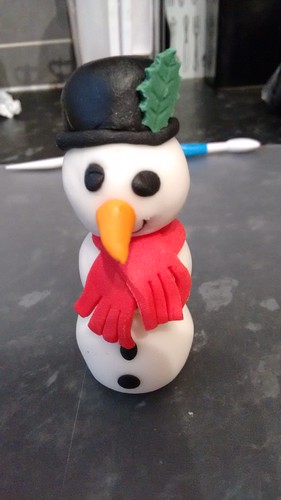
His Scarf:

We took the length of red fondant and cut the ends so it looked like the fringe of a scarf. Then we added a little drop of water on top of the second ball, to act like a glue, then wrapped the red fondant around the cocktail stick and pressed it down so the head would fit on.

His Head:

Again, in the same way that we put the buttons on, place his eyes on his head. Then add his carrot nose. If it doesn't stick, take it off, poke a hole where you want his carrot nose to be, pinch the end of the carrot that will be stuck to his face and press it into the hole. 

You'll probably have to tidy it up a little, but what's wrong with ugly veg anyway? 
His mouth is tricky so roll a very skinny, small sausage shape and place this where you want his smile to be. Press it on securely.

Don't put his head on his body just yet 

His Hat:

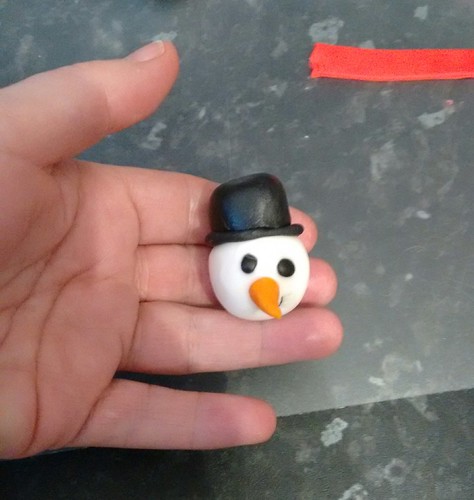
By now the black fondant will have started to harden so, cut a little slice off the bottom to make a flat surface, mould the top into any hat shape you like - bowler hat or top hat.

Now, whilst his head is the right way up on a flat surface, add a dab of water to the top. Gently press the black fondant shape to the top, this will also push the white fondant onto the flat surface ad give you a flat bottom.

Take your long black skinny sausage shape and carefully place it around the bottom of the black ball to make a rim for his hat.

Attach his head to his body:

By now, his body should have hardened a little and become a little more secure, so you can take out the cocktail stick.

Using a small dab of water as glue, stick his head onto his body.

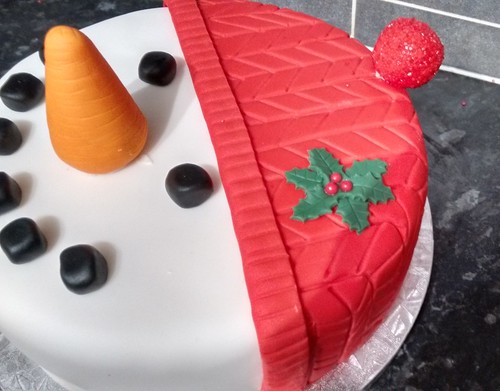
Add your holly leaf to his hat at voila! Your snowman!

Sprinkle with some festive magic - edible glitter

Leave his somewhere safe overnight to harden up.

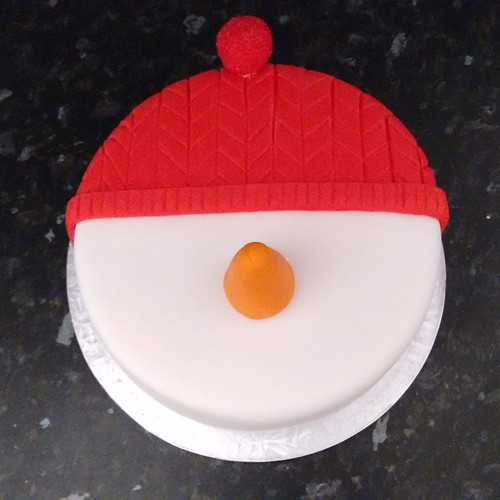
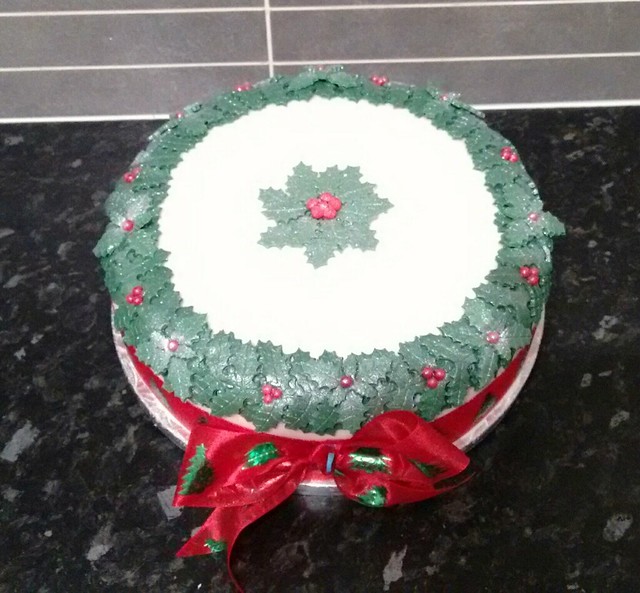
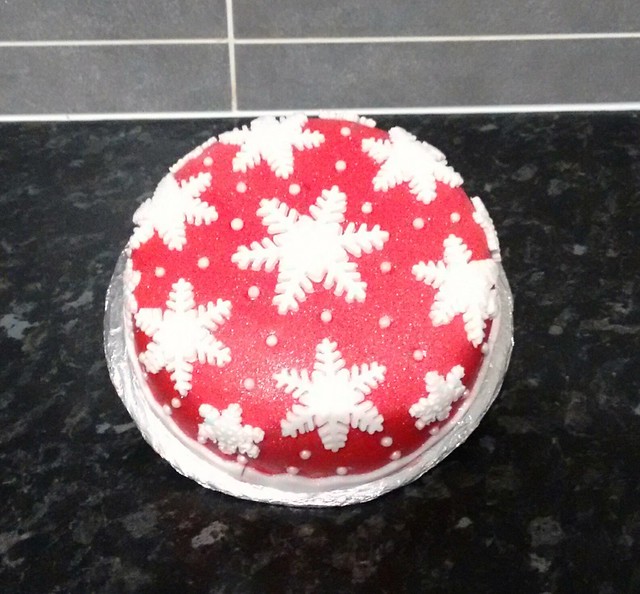
Here's another idea for some frosty friends:


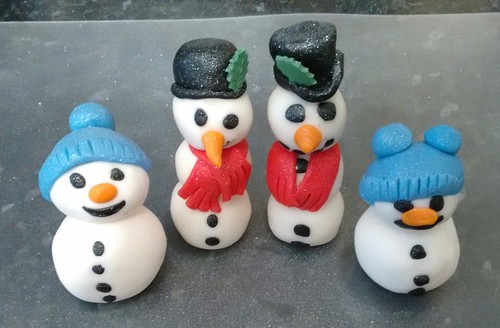
Have a Blessed Yule and a very Merry Christmas everyone!


Thank you all for your support in 2016

Thursday 22 December 2016

Snowman Decorated Cake


Whether you bake it or fake it - try this for something a little less traditional for your festive cake. This looks a little more complicated written down that it actually is, once you've read it through, it becomes clearer

If you want to bake your own cake, try my Rich Fruit Celebration Cake or the Easy Carrot Cake recipe

You will need:
  • A round white iced cake, any size
  • If you baked your own cake, or if your cake didn't come with one - a cake board at least 2" bigger than your cake 
  • Black and orange fondant
  • An additional two colours of your own choice. As a main colour I used red (#1) and the second colour I used was green (#2)
  • A little powdered icing, mixed to a thick paste to use as a 'glue' or some white buttercream
  • A pizza type / wheel  cutter
  • A ruler or something with a straight edge 
  • A cakepop stick or cocktail stick
  • Some coloured decorating sugar that matches fondant colour #1 (optional)
How to:

Roll out your main colour #1, dampen your cake, to act as a glue, and fix to less than half of  your cake. Smooth off.
To take away the freshly cut edge look, run your fingers gently over the raw edge.
This is going to be the bobble 'hat' or 'beanie'


Use your ruler or straight edge, mark guide lines at regular intervals. Use the blunt edge of a knife to score, gently, over these lines to make it look as though the 'hat' is knitted.


Next, roll out a thin band of fondant colour #1 and fix to the edge of your 'hat'.  This will make it look as though the knitted bobble hat has a turn up.


Soften the raw edges with your finger
Score at regular intervals to make it look like knitted rib.


Roll a ball of fondant colour #1 into a ball, cover in decorating coloured sugar and gently push into the cakepop stick or cocktail stick then take it off again.
If you cannot find a suitable colour sugar for your bobble, prick the bobble with a toothpick or with a star piping nozzle 


Take your cakepop stick and, on the very top centre of your cake, push it in, leaving enough to affix the bobble back on. If it's too long, trim to size. You don't want the stick to poke out of the top of the bobble.


The Nose:

With your orange fondant, roll and shape a cone. 
Using the back of a knife, score into it so it looks like the ridges on a real carrot.
It doesn't have to be perfect, after all, what's wrong with 'ugly veg'?


Before 'gluing' onto your cake, place the fondant carrot on the cake. If you are happy with the positioning, use a little icing, and your best 'eye', fix to your cake - don;t forget, we have eyes to go on too.

Pieces of coal or pebbles / stones:


Roll out your black fondant and cut into eight pieces


Gently mould the pieces to take away the raw, cut edges.
These don't have to be perfectly round because pebbles or pieces of coal aren't perfectly smooth or round


Fix the pieces to your cake for eyes and a mouth


It was about now that I decided that Frosty the Snowman here, needed a little festive holly on his bobble hat!


Measure the white portion of your cake, from the bottom of the hat on the one side to the other. Add about two inches to this number.


Roll out fondant colour #2 to the length you require and trim the sides so they're straight. Cut in half so you have two shorter lengths.
Roll out fondant colour #1 and cut stripes to fix onto your scarf.
Add and extra piece of colour #1 onto the ends and cut into a fringe.


Starting from the bottom on the bobble hat, fix one side and leave fringes hang free.
The do the same to the second side.
Tidy up the fringes so they look windswept.
Fixing the scarf to the snowman, once again, doesn't need to be perfect. I have yet to see a perfect knitted scarf on a real snowman, so if i looks scruffy, that's brilliant.


Sprinkle with some edible glitter to give that extra look of frostiness 

Featured Post


Easy Carrot Cake


I'm all for making things easy.  
This carrot cake is both delicious and simple to make

You will need:
Cake
  • 175g Caster sugar
  • 175ml Oil
  • 3 Large eggs
  • 140g Grated carrots
  • 175g Self raising flour
  • 1tsp Baking powder
Topping
  • 100g Icing sugar
  • 2tsp Lemon juice
  • 200g Philadelphia original cream cheese or similar product
  • Rind of lemon to decorate (optional), or you can use ...
  • Crushed walnuts / pecan nuts to decorate (optional) 
Notes:
If using a round baking tin, as I have, an 8" one will be ok
You can also use a foil rectangular baking tray

If you've used a foil rectangular baking tray, you can serve straight from there
Alternatively, you purchase ready made vanilla frosting and either use it as it is, or mix it with the cream cheese (to taste)


Instructions (made easy):

Place everything in the cake list, except the carrots, into a bowl and mix well

Add carrots and mix well
  • Spoon into a lined tin
  • Bake in the centre of the oven on Gas Mk4 for 45mins
  • When cooked, allow to cool when still in the tin / tray
Turn out onto a wire rack

The frosting:
  1. With the Philadelphia at room temperature, beat until soft
  2. Add lemon juice
  3. Add icing sugar, a spoonful at a time, and beat until all the icing sugar is mixed in
  4. Spread over carrot cake
  5. Sprinkle with walnuts or pecan nuts
Serve and enjoy

Featured Post


Friday 16 December 2016

Christmas Tree Cake


The last of the three cakes I decorated today.  

They're each made with my Rich Fruit Celebration Cake recipe in small, medium and large. All are alcohol free.

Because using frosting / buttercream to 'crumb coat and chill' is not an option with such a rich mix, the crumb coat was marmalade. Warm it up a little (microwave or hob), mix it a little then, using a brush, coat the cake with a thin layer before covering in marzipan.

I used white marzipan. Cover in exactly the same way as you would with fondant. Cover in a layer of fondant and decorate.

Decoration:

This is the medium sized one, about 6.5 inches.

I had no idea what I was going to do with this one. I pondered for some time, a Christmas tree was the only Christmas 'thing' I hadn't done today but I wanted it different.

I covered it in black fondant and gave it a generous blast of edible silver glitter, quite generous in fact. I allowed it to settle and dry some before I started fixing on the stars.

I cut quite a few small, medium and large from the one set of plunger cutters I have and allowed them to dry. Similar ones here on Amazon

I cut a basic Christmas tree shape out of the middle of a paper and placed the basic triangle shape on the cake for measure, I placed a bigger star at the top point as the tree topper (Similar ones here on Amazon). This star came from the set that is the next size up from the ones used previous and are metal cutters.

I then removed this shape and used the paper cutout (tree shaped hole in centre) that was left over to place on the top as a guide.

Place a few stars in strategic places so you can remove the paper and, using them as your guide, fill the shape with the small stars from the small set of plunger cutters. I used the tiny ones to squeeze into the spaces that were left so the tree looked fuller.


Next, again from the metal set of star cutters, I cut medium sized cutter to cut the ones that are fixed just off the edge of the top all the way around.


I used diamante cake ribbon around the base to add that extra bit of bling to this sparkley cake. Similar here on Amazon


Holly Wreath Christmas Cake


The second of three cakes I decorated today.  

They're each made with my Rich Fruit Celebration Cake recipe in small, medium and large. All are alcohol free.

Because using frosting / buttercream to 'crumb coat and chill' is not an option with such a rich mix, the crumb coat was marmalade. Warm it up a little (microwave or hob), mix it a little then, using a brush, coat the cake with a thin layer before covering in marzipan.

I used white marzipan. Cover in exactly the same way as you would with fondant. Cover in a layer of fondant and decorate.

Decoration:

This is the largest one, about 9 inches.

Cover in white fondant, I used a small holly wreath as a centre piece. The I cut each holly leaf and fixed them, individually along the top and outside edge. I then added red candy balls for berries.

A 2 inch red ribbon and bow, with printed green Christmas trees, finished it off wonderfully.


Snowflake Christmas Cake


One of three cakes I decorated today.  

They're each made with my Rich Fruit Celebration Cake recipe in small, medium and large. All are alcohol free.

Because using frosting / buttercream to 'crumb coat and chill' is not an option with such a rich mix, the crumb coat was marmalade. Warm it up a little (microwave or hob), mix it a little then, using a brush, coat the cake with a thin layer before covering in marzipan.

I used white marzipan. Cover in exactly the same way as you would with fondant. Cover in a layer of fondant and decorate.

Decoration:

This is the smallest one, about 5 inches.

Cover in red fondant and, using three different size snowflake cutters, these cutters are the ones also used to make the festive fondant Christmas tree.

Cut one large for the centre, medium ones along the top edge and the smaller ones around the sides. I then added some white balls in between snowflakes and cut a ribbon from fondant. 


Rich Fruit Cake

Perfect for all special occasions. On its own or covered with marzipan and icing.

You can substitute some of the liquid for bandy, whisky or rum for that extra special-ness (see step)

Planning note: Fruit will be soaked overnight

You will need (a lot of things):
Ingredients Part 1 aka 'Bowl 1' 
  • 220ml of hot, strong tea or orange juice (see notes ❅)
  • 750g or dried, mixed fruit (see notes ❅❅)
Ingredients Part 2 aka 'Bowl 2' 
  • 200g Unsalted butter 
  • 110g Glace cherries (halved)
  • 225g Dark brown sugar
  • 4 Medium eggs, lightly beaten
  • 225g Plain, white flour
  • ¾ tsp Baking powder
  • 1tsp Ground cinnamon
  • 1/5tsp Ground cloves
  • 1tsp Mixed spice
  • 1tsp Vanilla extract
  • Small amount of margarine / butter for greasing tin
Equipment:
  • 1 8" cake tin at least 3" deep
  • A saucepan
  • 2 Mixing bowl, plus 1 bowl for eggs
  • Measuring spoons
  • Greaseproof paper
  • String - suitable for the oven
  • Mixing spoons
  • Tea towel or cling film
  • A sieve to drain fruit
Notes:
★ If you have two different size bowls, the largest size will be best suited as Bowl 2
 Liquids: For more indulgence, replace half this liquid with Brandy, Rum or Whisky. If using alcohol, you will need to make this cake weeks in advance to allow maturing and feeding (see step later on)
❅❅ Fruit: I purchased ready mixed fruit, if you don't want to use ready mixed, you can use any or all of the following up to 750kg:
  • Sultanas
  • Raisins
  • Craisins
  • Currants

Day #1 - Bowl #1:
  1. Weigh and wash your fruit
  2. Drain through a sieve
  3. Place in a large bowl
  4. Allow your liquid to come to room temperature
  5. Pour over the fruit and cover with a tea towel or cling film
  6. Allow to soak overnight or a minimum of six hours
  7. Cut cherries in half and mix into Bowl 1

Day #2:
  • Cut cherries in half and mix into Bowl 1

Melt Butter and Sugar:


** Preheat the oven to Gas mark 2 ***
  • Ensure all ingredients are at room temperature
  • Melt the butter and sugar together in a saucepan. stir continually until it has mixed well. Allow to cool.
  • Whilst cooling, grease and line your tin. 
  • Pour mix into Bowl 2
  • Lightly beat your eggs with the vanilla - Mix in to Bowl 2
  • Sift and mix together, into Bowl 2, the remaining dry ingredients from 'Bowl 2' list

Combine both bowls:
  • Add a spoonful of fruit at a time and fold in
Measure greaseproof papers for the outside of the tin:
  • Measure your tin, round and height, and cut a length of greaseproof paper to fit around (plus a little more) and four times the height.
  • Fold this in half and ensure that it comes over the rim of your tin by about 2 inches.
  • Place to one side
Spoon mixture into tin:
  • Spoon the mixture into the tin and flatten the top
Secure paper to tin:
  • Take your length of greaseproof paper and secure it around the tin with the string
  • This is to ensure that, if it rises over the sides of your tin, it won't spill
Bake and allow to cool:
  • Bake in centre of the oven for 4 - 4.5hrs or until a skewer, inserted into the centre of the cake, comes out clean.
  • Once cooked, allow to cool in the tin, then turn out onto a wire rack
Storage:
  • Store, wrapped in a double layer of greaseproof paper and a layer of foil.
  • You can leave the foil if you have a tin to keep it in.
  • Store at room temperature or in the freezer.
  • Can be stored for up to six - eight weeks.
Feeding and maturing (optional):
  • If using alcohol, feed the cake with 1-2tbsp of Brandy every two weeks until it's decorated.
  • Do not feed the cake for the last week. This will give the surface a chance to dry before decorating.
  • Maturing is optional if not using alcohol.
Resizing your mix:
I will adjust the cake mixes using egg quantities as a guide. Amend and adjust the other ingredients to accommodate the eggs.
  • 10 inch cake - add 50% more - two eggs and adjust ingredients to match.
  • 8 inch cake - leave as recipe above.
  • 6 inch cake - reduce by 25%
  • 4 inch cake - reduce by 75%

Decorate (optional)
Decorate your cake for whatever celebration you desire or eat as is.
Related Posts Plugin for WordPress, Blogger...